
Transplanting tomato seedlings outdoors is one of the most important moments in the tomato growing season. Done right, plants take off quickly, develop strong roots, and start steady growth within a week. Done too early or too roughly, and they stall, yellow, or struggle for weeks.
Transplant tomatoes only after the soil is warm and frost risk is gone, harden them off gradually, plant them deeper than they were growing, and water them in well. If you get those four things right, most transplant problems simply don’t happen.
Quick steps that make the biggest difference:
- Transplant only after frost risk has passed
- Wait for warm soil (not just warm air)
- Harden seedlings off over 7-10 days
- Plant deeply (bury part of the stem)
- Water thoroughly after planting
- Add support immediately
Rule of thumb: Warm soil + gradual transition + deep planting = Strong, fast-growing tomatoes
For the full season after transplanting, including spacing, watering, pruning, feeding, and harvesting, see my complete guide on how to grow tomatoes.
When Tomato Seedlings Are Ready to Transplant
Transplanting isn’t just about the calendar. It’s about the plant being physically ready to handle the move. Healthy, well-developed seedlings adjust quickly. Weak or overgrown ones tend to stall.
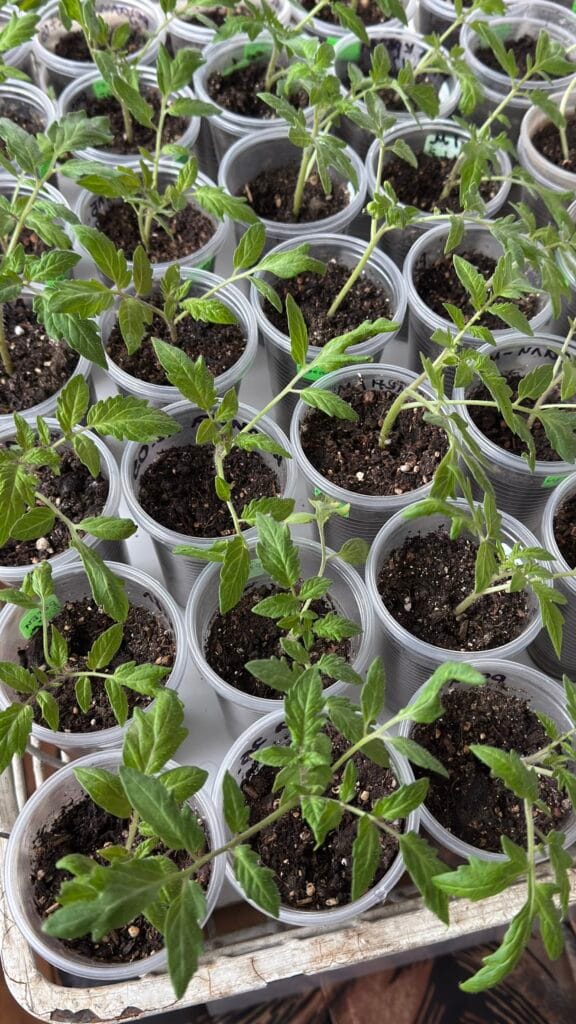
Ideal Size and Age
Most tomato seedlings are ready when they:
- Are 6-10 inches tall
- Are about 6-8 weeks old
- Have several sets of true leaves
- Have a thick, sturdy stem (not thin or stretched)
You don’t need perfectly uniform plants, but avoid anything spindly or overly tall with small leaves. Those are harder to recover after transplanting.
Root Development Signs
Before planting, check the roots. This tells you more than the leaves.
- Roots should hold the soil together when you slide the plant out
- The root ball should stay intact, not fall apart
- Roots should not be tightly circling the pot
If the roots are packed tightly and circling, the plant is already stressed and may struggle to establish itself.
Why Bigger Is Not Always Better
It’s tempting to wait for large plants, but oversized seedlings often perform worse.
- Overgrown plants adapt more slowly after transplanting
- Early flowering indoors reduces root development
- Tall, weak plants are more prone to transplant shock
A compact, sturdy seedling will almost always outperform a large, stressed one after planting.
If a seedling is already small and flowering indoors, remove the first flowers after transplanting. This helps the plant put energy into roots and leaves before carrying fruit.
When to Transplant Outdoors (Timing That Actually Works)
Timing is where most problems start. Even healthy seedlings will stall if conditions aren’t right.
Frost Risk Must Be Gone
Tomatoes are warm-season plants. Even a light frost can damage or kill them.
Wait until:
- Your last frost date has passed
- Night temperatures stay consistently above freezing
If there’s any doubt, wait a few extra days. Tomatoes recover from late planting much faster than from cold damage.
Soil Temperature Matters More Than Air
Warm afternoons can be misleading. The soil controls root growth.
- Aim for a soil temperature of about 60-65°F (16-18°C), with 65°F being ideal for faster growth.
- Cold soil slows or stops root development
Planting into cold soil often results in stalled plants that fail to grow for 1-2 weeks.
Night Temperatures Matter Most
Tomatoes establish best when nights stay consistently above about 50-55°F (10-13°C). Warmer nights around 60°F (15°C) are even better.
Before transplanting:
- Check the 7-10 day forecast
- Avoid planting just before a cold stretch
Warm days don’t compensate for cold nights.
Best Time of Day to Transplant
The goal is to reduce stress during the move.
Best timing:
- Late afternoon or early evening
- Or on a cloudy day
Avoid midday planting when the sun is strongest. That’s when plants lose the most moisture.
Hardening Off Tomato Seedlings (Preventing Transplant Shock)
Indoor seedlings are not ready for outdoor conditions right away. Hardening off bridges that gap.
Why Hardening Off Matters
Indoor plants are protected. Outdoors, they face:
- Direct sunlight
- Wind
- Temperature swings
Without adjustment, plants often:
- Wilt quickly
- Develop leaf burn
- Stop growing for several days
Simple 7-10 Day Plan
Keep it gradual and predictable.
- Day 1-2: Place in shade for 1-2 hours
- Day 3-5: Increase time outdoors, still mostly shaded
- Day 6-8: Introduce some direct sun
- Final days: Full outdoor exposure
Bring plants inside at night if temperatures drop too low.
Important Mistake to Avoid
Do not use cold exposure as a shortcut. Hardening off is not about stressing plants. It’s about slowly building tolerance.
Best Weather Conditions for Transplanting
Even with perfect timing, the weather on transplant day still matters. The goal is to reduce stress while roots adjust.
Ideal Conditions
Look for:
- Mild temperatures
- Light cloud cover
- Little to no wind
These conditions reduce water loss and give roots time to settle.
Avoid Transplanting When
Skip planting if conditions are harsh:
- Strong wind (dries plants quickly)
- Cold rain (chills the soil)
- Heat waves (rapid moisture loss)
- Sudden temperature drops
Waiting a day or two often makes a noticeable difference in how plants establish.
Preparing the Planting Site
Good transplanting starts before the plant goes into the ground. A well-prepared site helps roots spread quickly instead of struggling.
Sunlight and Location
Tomatoes need consistent sun to grow well.
- At least 6-8 hours of direct sunlight
- Good airflow to reduce disease risk
- Enough space to avoid crowding later
Shady or cramped spots lead to weak growth and lower yields.
Soil Conditions
Roots need loose, workable soil.
- Soil should be loose and well-draining
- Avoid compacted or soggy areas
- Work the soil lightly if needed to break clumps
The soil should also be slightly moist at planting time, lightly damp, not dry, sticky, or waterlogged. Heavy, compact soil slows root expansion.
Pre-Warming the Soil (Optional but Powerful)
If your soil is still cool, warming it helps.
- Cover the soil with black plastic for several days
- Especially useful in cooler climates
Warmer soil speeds up root growth right after transplanting.
Avoid Problem Areas
Certain spots create ongoing issues:
- Waterlogged soil
- Areas recently used for tomatoes or other nightshades
Rotating planting spots helps reduce disease pressure over time.
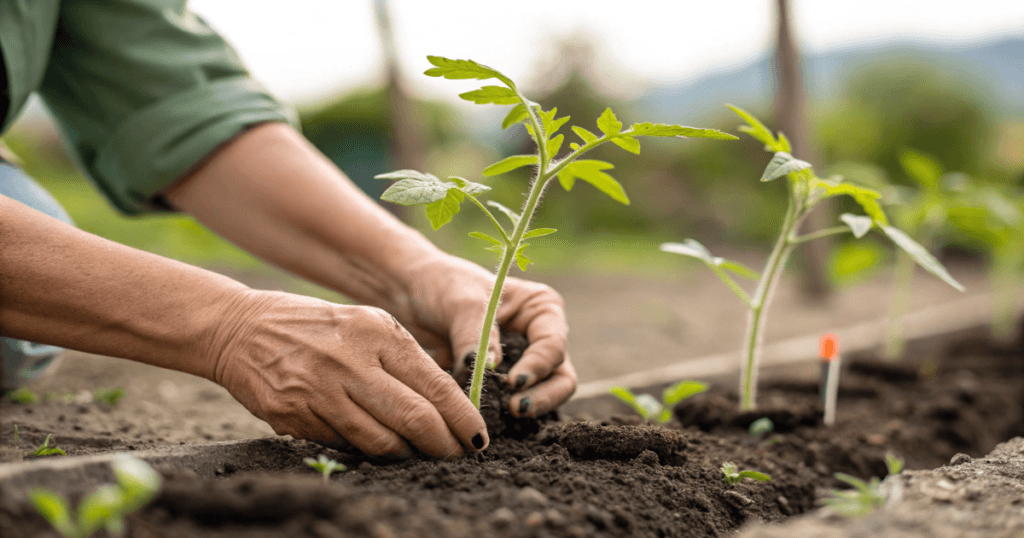
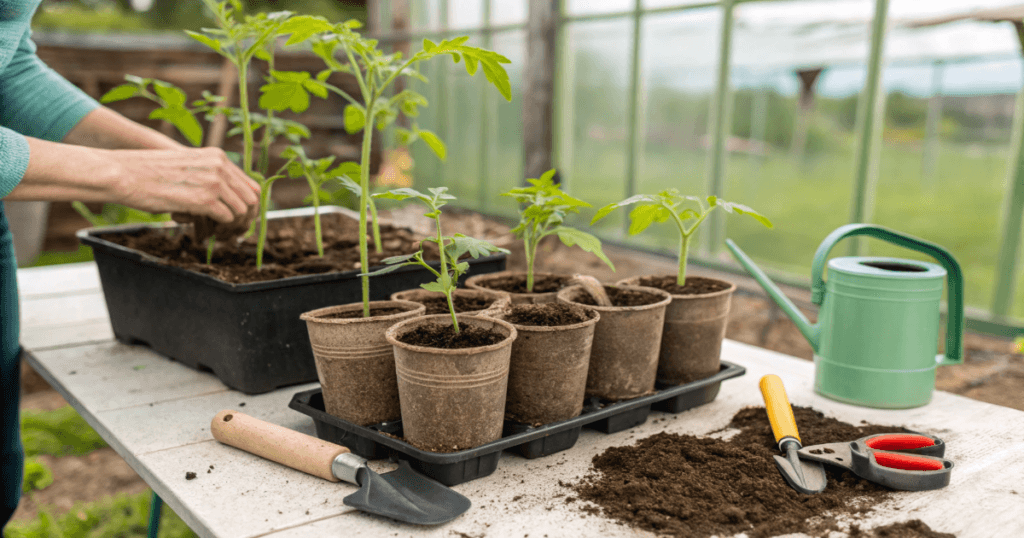
Transplanting Tomato Seedlings Step by Step
The actual transplanting process is simple, but small details make a big difference in how plants recover.
Step 1 – Water Before Transplanting
Water seedlings a few hours before planting.
- Hydrated plants handle stress better
- Dry root balls are harder to establish
Step 2 – Handle the Root Ball Gently
Remove plants carefully. If roots are lightly circling, gently loosen them before planting. If roots are severely root-bound, lightly break up the outer layer.
- Do not pull by the stem
- Support the root ball from below
- Keep soil intact
Damage at this stage slows recovery.
Step 3 – Plant Deeply
Tomatoes are unique. They can form roots along buried stems.
- Remove lower leaves
- Bury the stem up to the lowest remaining healthy leaves
- Keep several healthy leaves above the soil
This creates a stronger, more stable root system.
Do not bury damaged, diseased, or yellowing leaves. Remove lower leaves first, then bury only clean stem tissue so nothing rots below the soil line.
Step 4 – Firm Soil Gently
After placing the plant:
- Press soil lightly around the roots
- Remove large air pockets
- Avoid compacting too hard
Roots need contact with soil, but also space to grow.
Step 5 – Water Immediately
Water slowly until the soil is moist 6-8 inches deep. This helps soil settle around the roots and reduces transplant shock. Use ambient-temperature water if possible, and avoid very cold water right after planting.
Step 6 – Add Support Immediately
Install support at planting time.
- Stakes, cages, or trellis
- Prevents root damage later
Waiting often leads to accidental root disturbance.
Deep Planting vs Trench Planting
Not all seedlings are shaped the same. Choosing the right planting method helps correct common issues like legginess.
Deep Planting
Best for compact plants.
- Dig a deep hole
- Bury part of the stem vertically
Works well in loose, deep soil.
Trench Planting
Ideal for tall or leggy seedlings.
- Lay the stem horizontally in a shallow trench
- Cover part of it with soil
The buried stem develops additional roots, improving stability. Trench planting is especially useful when deeper soil is still cool, compacted, or heavy. The upper soil layer is usually warmer, so a shallow horizontal stem can root faster than one buried deep into cold soil.
Which Is Better?
Both methods work well.
- Use deep planting for shorter plants
- Use trench planting for long, stretched seedlings
Choose based on plant shape and soil depth, not preference.
Spacing Tomatoes at Transplant Time
Spacing decisions affect the entire season. It’s much harder to fix overcrowding later.
Basic Spacing
- Determinate varieties: 18-24 inches apart
- Indeterminate varieties: 24-36 inches apart
Why Spacing Matters
Proper spacing:
- Improves airflow
- Reduces disease risk
- Makes watering and harvesting easier
Crowded plants compete for light and moisture, leading to weaker growth.
Transplanting in Raised Beds
Raised beds change how soil behaves, especially early in the season.
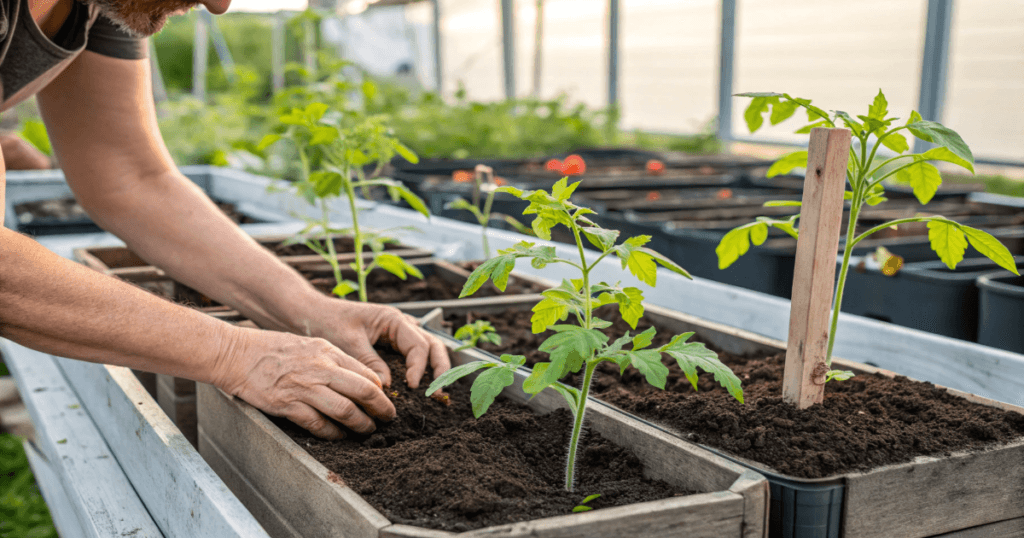
Why Raised Beds Help
Raised beds:
- Warm up faster in spring
- Drain more efficiently
- Allow better control over soil quality
This often leads to quicker early growth.
Recommended Setup
For best results:
- Minimum depth of about 12 inches (works, but limits root growth)
- Ideal depth: 18-24 inches for strong root development and higher yields
- Loose, well-draining soil mix
Tomatoes naturally develop deep, extensive root systems, especially when you plant them deeply. A deeper bed holds moisture more evenly, reduces stress during hot weather, and supports more stable, productive plants.
Spacing in Raised Beds
You can space slightly tighter than in-ground because the soil is more controlled, but airflow still matters.
- Determinate: 18-24 inches apart
- Indeterminate: 24-30 inches apart (don’t go tighter unless you prune consistently)
- Leave at least a hand’s width between plants for airflow
- Avoid dense planting in humid conditions
Slightly tighter spacing is fine, poor airflow is not.
Key Difference After Transplanting
Raised beds dry out faster.
- Check moisture more frequently
- Water deeply when needed
Transplanting Tomatoes in Containers
Container growing requires a slightly different approach, especially with root space and watering.
Container Size Matters Most
Tomatoes need room for roots.
- Minimum: 5 gallons per plant (works for cherry or compact varieties)
- Better: 10-15 gallons for most tomato plants
- Best for indeterminate tomatoes: 15-20 gallons if space allows
- Choose a container at least 12-18 inches deep
- Make sure it has several drainage holes
- Larger containers produce better results
Small pots dry out fast, restrict roots, and often lead to stressed plants with fewer tomatoes.
Planting Depth
Use the same deep planting method as in-ground.
- Remove the lowest leaves
- Bury part of the stem
- Leave several healthy leaves above the soil
- Firm the mix gently around the roots
Watering Differences
Containers dry out quickly.
- Expect more frequent watering
- Check the soil regularly, especially in warm weather
- Water when the top 1-2 inches of soil feel dry
- Water deeply until excess drains from the bottom
- Avoid letting the container fully dry out between waterings
In hot summer weather, container tomatoes may need water every day, especially in smaller pots or windy locations.
Common Mistake
The most common container mistake is using a pot that is too small.
Small containers:
- Restrict root growth
- Dry out too quickly
- Make watering inconsistent
- Causes more heat stress
- Lead to weaker plants and lower yields
What to Do Right After Transplanting
The first few days matter more than most people expect. This is when roots begin adjusting.
First 24-48 Hours
Focus on stability. Keep the soil evenly moist, but not soggy. Check the plant at least once a day, especially if the weather is warm or windy.
- Water deeply right after planting
- Recheck the moisture the next day
- Keep soil evenly moist
- Avoid letting the root zone dry out
- Avoid additional stress from the sun or wind
Shade and Protection
If the sun is strong or the plant looks stressed, give temporary protection for the first day or two.
- Use shade cloth, a garden chair, cardboard, or a lightweight cover
- Shield plants from strong wind
- Remove the shade once the plant stands upright again
This helps prevent early wilting while roots settle.
When to Mulch
Mulch helps hold moisture, but don’t apply it too early in cool soil.
- Wait until the soil has warmed
- Keep mulch a few inches away from the stem
- Use straw, shredded leaves, grass clippings, or compost
Mulching too early can trap cold soil around the roots and slow growth.
Do NOT Fertilize Immediately
New roots are sensitive. Let the plant establish before feeding.
Wait about 7-10 days before applying fertilizer, unless your soil mix already contains a gentle starter fertilizer. Feeding too soon can push top growth before the roots are ready to support it.
How Long Do Tomatoes Take to Establish
After transplanting, plants usually go through a short adjustment phase.
Normal Adjustment Period
Tomato seedlings often need a short adjustment period after transplanting. Mild stress for the first 3-7 days is normal, especially after sun, wind, or temperature changes.
During this time, you may notice:
- Slight drooping during the warmest part of the day
- Slower visible growth
- A few older lower leaves are yellowing
As long as the plant looks better in the morning or evening, it is usually recovering.
Signs of Recovery
Healthy plants will show:
- New upright growth
- Improved leaf color
- Stronger stems
- Leaves hold their shape better during the day
Once new growth appears, roots are established.
Common Transplant Problems (And Fixes)
Even with good timing, minor issues can happen. Most are easy to correct if caught early.
Wilting
- Short-term wilting is normal, especially during the warmest part of the day.
- Persistent wilting indicates stress
Fix:
- Water deeply if the soil is dry
- Provide temporary shade for 1-2 days
- Protect from strong winds
- Avoid fertilizing until the plant recovers
Yellowing Leaves
A few yellow lower leaves can happen after transplanting. It is often linked to cold soil, overwatering, or normal adjustment stress.
Fix:
- Check that the soil is moist, not soggy
- Wait for warmer soil and steady growth
- Remove yellow leaves only if they are fully dying
Stalled Growth
If the plant looks alive but does not grow, the soil is often too cold, or the plant was moved outside too early.
Fix:
- Wait for warmer conditions
- Avoid overwatering
- Protect plants from cold nights
- Growth usually resumes naturally
Sunscald
Sunscald appears as pale, bleached, or papery spots on leaves. It usually happens when seedlings are moved into strong sunlight too quickly.
Fix:
- Provide temporary shade
- Continue gradual sun exposure
- Leave damaged leaves if they are still partly green
Leggy Seedlings
Leggy seedlings have long, weak stems and may lean after planting.
Fix:
- Plant deeper or use trench planting
- Add support right away
- Keep the plant protected from strong winds for the first few days
What If Something Goes Wrong?
Sometimes conditions change after planting. Quick action can prevent long-term damage.
Transplant Shock
Symptoms:
- Wilting that does not improve by evening
- Leaf curl
- Slow growth
- Dull or slightly faded leaf color
Fix:
- Keep moisture consistent
- Provide temporary shade
- Protect from wind
- Avoid fertilizing
Most plants recover within a week.
Cold Snap After Planting
If temperatures drop unexpectedly, protect plants overnight.
- Cover plants with row cover, buckets, frost cloth, or lightweight fabric
- Remove covers in the morning once temperatures rise
- Avoid touching the leaves directly with plastic
Even simple covers can prevent damage.
Transplanting Flowering Seedlings
If a small seedling is already flowering, remove the first flowers after transplanting.
This helps the plant focus on root and leaf growth first.
Beginner Mistakes to Avoid
These are the most common reasons tomatoes struggle after transplanting:
- Transplanting too early
- Ignoring soil temperature
- Skipping hardening off
- Planting too shallow
- Overwatering immediately after planting
- Not supporting plants early
- Crowding plants
Avoiding these mistakes is often enough to ensure strong growth.
Quick Transplant Checklist
Before planting, run through this quick check:
- Frost risk has passed
- Soil is warm
- Seedlings are hardened off
- Plants will be set deeply
- Water is ready
- Support is installed
- Protection is available if needed
At its core, transplanting tomato seedlings is about reducing stress: warm soil, gradual hardening off, deep planting, steady moisture, and early support.
Conclusion
Transplanting tomato seedlings is less about technique and more about timing and conditions. When you wait for warm soil, harden plants off properly, and plant them deep, most of the common problems never show up in the first place.
In the first few days, focus on stability, steady moisture, and protection from stress. After that, healthy plants usually take over on their own, pushing new growth and settling in quickly.
If something goes wrong, it’s rarely permanent. Most transplant issues come down to cold soil, sudden exposure, or inconsistent watering, and all of these can be corrected with simple adjustments.
Take your time with this step, and your tomatoes will reward you with stronger growth, better resilience, and a much smoother season ahead.
Leave a Reply