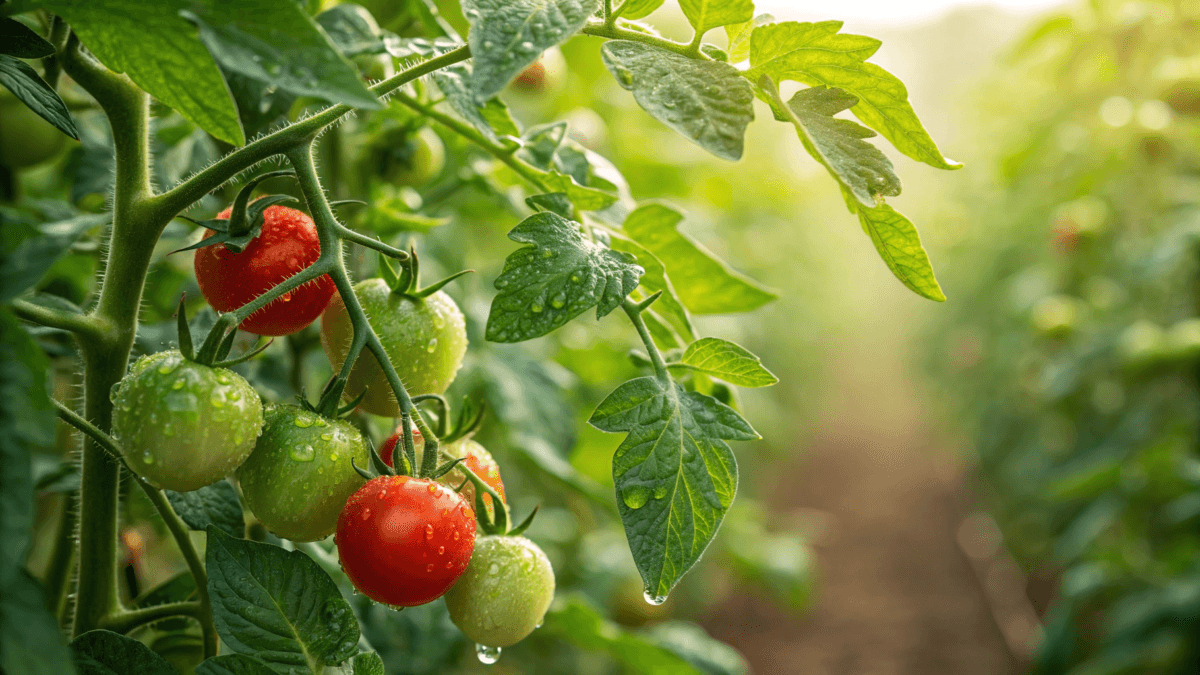
Growing tomatoes successfully comes down to managing five core factors: soil warmth at planting, deep transplanting, proper spacing and airflow, consistent deep watering, and balanced feeding that shifts once flowering begins. Most tomato problems are not random; they are the result of timing errors, nitrogen imbalance, poor airflow, or irregular moisture.
Most failed tomato crops don’t fail because tomatoes are difficult. They fail because one of these five factors was slightly off, usually earlier than the gardener realized.
Tomatoes are long-season crops. They respond best to early root stability, consistent moisture, and steady care once flowering begins. When these elements are controlled, tomatoes are one of the most productive crops in a home garden.
Key foundations:
- Plant only after the soil reaches at least 60°F
- Bury stems deeply to encourage root expansion
- Space generously for airflow
- Install support at planting
- Adjust fertilizer once flowers form
This guide covers the complete growing cycle from variety selection to end-of-season cleanup.
Tomatoes are one of the most productive crops within the broader group of fruiting vegetables, which includes warm-season plants grown for the harvest that develops after flowering.
Choosing the Right Type of Tomato
Before you plant, decide what kind of tomato fits your space, climate, and goals. This single decision affects pruning, support structure, harvest timing, and even how often you’ll be picking fruit.
Determinate vs. Indeterminate (Why It Matters for Care)
Tomatoes grow in two basic habits: determinate (bush type) and indeterminate (vining type).
Determinate tomatoes:
- Grow to a set height (usually 2-4 feet)
- Set most fruit within a short period
- Require minimal pruning
- Work well in containers and small beds
They’re excellent if you want a big harvest for sauce or canning all at once.
Indeterminate tomatoes:
- Can reach 6-10 feet with support
- Continue growing and flowering all season
- Produce steadily until frost
- Require strong staking or trellising
- Require regular pruning to control density
They’re ideal if you want fresh tomatoes for months.
Cherry, Roma, Slicer, or Heirloom?
Fruit type determines yield volume, culinary use, and management tolerance.
Yield reliability is generally higher in modern disease-resistant hybrids. Heirlooms reward careful management but are less forgiving of stress.
Cherry tomatoes:
- Earlier maturity
- High productivity
- More forgiving under stress
- Excellent for beginners
Roma or paste tomatoes:
- Dense flesh
- Lower water content
- Concentrated harvest
- Great for sauces
Slicer tomatoes:
- Larger fruit size
- Longer maturity period
- Require consistent watering to prevent cracking
Heirloom varieties:
- Superior flavor complexity
- Often, lower disease resistance
- More sensitive to inconsistent watering
If you’re new, start with a disease-resistant cherry or slicer type. They tolerate minor mistakes better than heirlooms.
How to Match Variety to Your Climate
Not all tomatoes thrive everywhere. Look for varieties labeled with disease resistance codes such as V, F, N, or T on seed packets. These indicate resistance to Verticillium, Fusarium, nematodes, and tobacco mosaic virus.
- In hot southern climates (USDA Zones 8-10), choose heat-tolerant varieties that can continue setting fruit when daytime temperatures exceed 90°F (32°C). Good options include ‘Heatmaster,’ ‘Solar Fire,’ ‘Phoenix,’ and ‘Arkansas Traveler.’ These varieties are bred to maintain pollination and fruit set during prolonged heat waves.
- In humid regions such as the Southeast and parts of the Midwest (Zones 6-9), select varieties with strong disease resistance to early blight, septoria leaf spot, and fusarium wilt. Reliable options include ‘Celebrity,’ ‘Better Boy,’ ‘Defiant,’ and ‘Mountain Merit,’ which are bred for improved resistance in high-humidity environments.
- In cool coastal climates or short growing seasons (Zones 3-6), choose early-maturing or smaller-fruited varieties that ripen reliably in moderate sunlight. Cherry and small slicer types such as ‘Sungold,’ ‘Early Girl,’ ‘Glacier,’ and ‘Stupice’ often perform better than large beefsteak varieties, which require longer heat accumulation to mature fully.
Climate plays a larger role in tomato success than many gardeners realize. Matching variety to temperature patterns and disease pressure reduces mid-season problems dramatically.
When to Plant Tomatoes (Timing That Prevents Failure)
Tomatoes are warm-season plants. Planting too early is one of the most common beginner mistakes.
Even when air temperatures feel warm, cold soil can delay root establishment for several weeks, which permanently reduces early plant momentum.
Ideal Soil Temperature
Tomato roots become active above 65°F (18°C). Optimal growth begins between 70-85°F and night temperatures of 60-70°F (15-21°C).
Cold soil:
- Stunts plants for weeks
- Slows root growth
- Causes purple-tinged leaves
Soil temperature is more reliable than air temperature because root temperature controls early nutrient uptake.
Typical Planting Windows (Adjust to Local Frost Dates)
These are rough starting points; always confirm with your local last frost date and soil temperature.
Northern states: Late May through early June
Midwest: Mid to late May
Southern states: March through April
Warm climates: Late summer for fall harvest
Can You Plant Too Early or Too Late?
Timing mistakes at transplanting don’t usually kill tomatoes, but they can slow growth for weeks and reduce total yield. Planting too early or too late often creates problems that show up much later in the season.
Too early:
- Stalled growth
- Pale leaves
Too late:
- Poor fruit set
- Flowers form during extreme heat, which reduces pollination and fruit set
Check the “days to maturity” on the seed packet and count forward from transplanting, not from seeding date.
In warm climates, fall planting is viable if at least 90 frost-free days remain.
Tomato Temperature Requirements (At Each Growth Stage)
Tomatoes respond strongly to temperature at every stage of growth. Understanding these ranges prevents most timing mistakes.
Seed Germination
Optimal soil temperature: 70-85°F (21-29°C)
Minimum: 60°F (16°C)
Below 55°F, germination slows dramatically.
Seedling Growth
Ideal daytime: 65-75°F (18-24°C)
Night: 55-65°F (13-18°C)
Cooler temperatures slow growth but improve root development.
Flowering & Fruit Set
Ideal daytime: 70-85°F (21-29°C)
Night: 60-70°F (16-21°C)
Above 90°F (32°C) or nights above 75°F (24°C), pollination declines.
Ripening
Best color development: 68-77°F (20-25°C)
Below 55°F, ripening slows.
Above 85°F, red pigment production decreases.
Frost Damage
Light frost at 32°F (0°C) damages foliage.
Below 28°F (-2°C) usually kill plants.
Heat Stress
Prolonged exposure above 95°F (35°C) slows growth and reduces fruit size.
How Long Do Tomatoes Take to Grow?
Tomato timing depends on whether you’re counting from seed or from transplant.
From Transplant to Harvest
Most varieties take 60-100 days from transplanting to mature fruit, depending on type.
Cherry varieties mature faster than large slicers or beefsteaks.
Indeterminate types continue producing until frost.
From Seed to Harvest
If starting from seed, add 6-8 weeks of indoor seedling growth before transplanting.
That means total time from seed to first harvest is usually 100-140 days, depending on variety and climate.
Germination Time
Tomato seeds typically germinate in 5-10 days in warm soil, 70-85°F (21-29°C). Cooler soil slows germination significantly.
From Flower to Ripe Fruit
After flowering, fruit usually takes 20-30 days to reach full size and begin ripening. Full color development takes another 7-14 days, depending on temperature.
Larger, heavy-fruited varieties often take longer to color fully than cherry types.
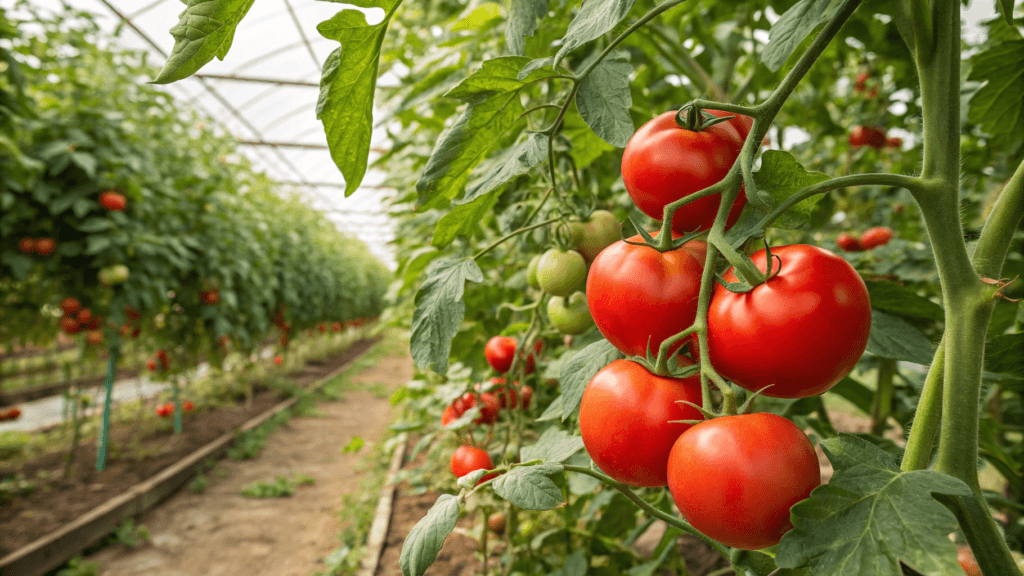
Where to Plant Tomatoes (Sun, Airflow & Location Decisions)
Site selection strongly influences disease pressure and yield. Even healthy seedlings will struggle if planted in poor light, stagnant air, or consistently damp conditions.
Choosing the right location reduces mid-season problems before they start.
How Much Sun Do Tomatoes Need?
Tomatoes need at least 6-8 hours of direct sun (8+ is ideal for best yields).
Morning sun is especially helpful because it dries leaves quickly, reducing the risk of fungal disease.
Avoid:
- Shady fences
- Low-damp areas
- Crowded corners with poor airflow
Insufficient sun results in tall, weak growth and reduced fruiting.
Why Airflow Prevents Disease
Fungal diseases don’t begin because the plant is weak. They begin because moisture lingers on leaves too long.
Proper spacing reduces leaf wetness duration, which is what actually limits fungal spread.
To reduce disease pressure:
- Keep the lowest leaves off the soil line
- Mulch to prevent soil splash
- Water at the base, not overhead
Crop Rotation Basics (Avoiding Soil-Borne Disease)
Tomatoes belong to the nightshade family.
Avoid planting after:
- Peppers
- Eggplant
- Potatoes
These crops share soil-borne pathogens.
Good crops to plant before tomatoes:
- Beans and peas (they improve soil nitrogen levels)
- Lettuce and other leafy greens
- Carrots and root crops
- Cucumbers and squash (if disease pressure was low)
- Brassicas such as cabbage or broccoli
Rotating away from other nightshades for at least 2-3 years reduces the buildup of fungal pathogens and soil-borne wilt diseases.
How Wind Exposure Affects Tomato Growth
Tomatoes benefit from airflow but struggle in constant, strong winds. Excess wind dries soil quickly, damages flowers, and reduces pollination. Choose locations with open airflow but some protection from prevailing winds when possible.
How to Plant Tomatoes Properly
Transplanting technique influences root mass and long-term drought tolerance.
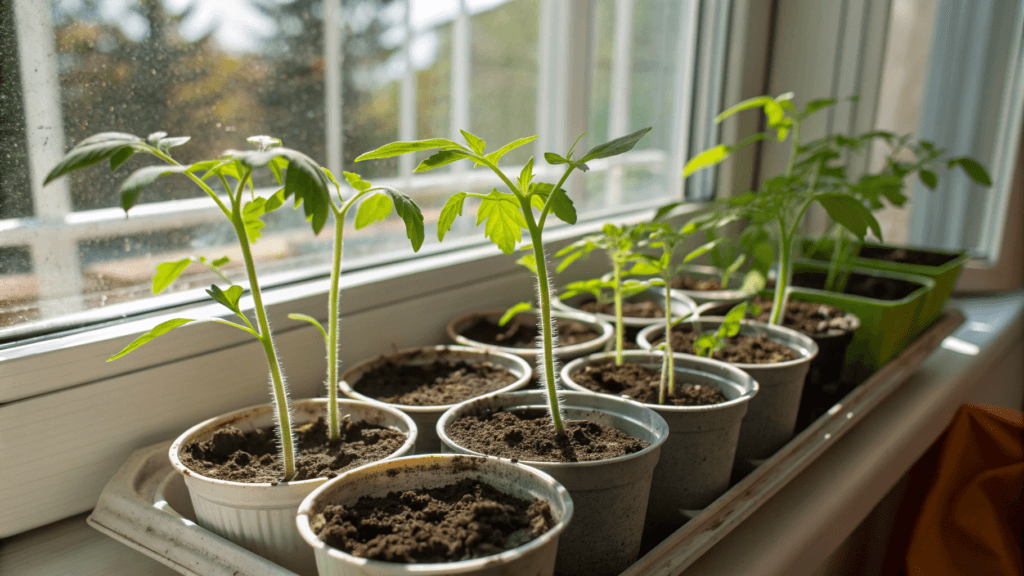
Starting tomatoes from seed requires 6-8 weeks of indoor growth before transplanting. Seedlings should have thick stems and dark green leaves before planting outdoors.
Planting Depth Trick (Bury the Stem)
Tomatoes form roots along buried stems, so planting deeper than the nursery pot level builds a bigger root system.
Remove lower leaves and bury 2/3 of the stem vertically.
If seedlings are tall and leggy:
- Dig a shallow trench
- Lay the stem sideways
- Cover all but the top cluster of leaves
For tall seedlings, trench planting improves root surface area and anchoring strength.
Hardening Off (Don’t Skip This)
Before transplanting, harden seedlings off for 7-10 days. Start with 1-2 hours outside in shade, then increase time and sun exposure daily.
Bring plants in if nights drop ~50°F (10°C). Skipping hardening off often causes stalled growth, leaf scorch, and slow recovery.
This builds a strong root system and improves drought tolerance later. A bigger root system helps the plant handle heat and uneven watering later.
Spacing Guidelines (By Growth Type)
Spacing affects airflow, disease resistance, and fruit size.
- Determinate: 18-24 inches apart
- Indeterminate: 24-36 inches apart
Crowded plants trap humidity and increase the risk of fungal growth.
In raised beds, resist the urge to overfill. Full-grown tomatoes are wider than they look at transplant time, so keep at least 18 inches between rows.
Watering Immediately After Planting
Water deeply right after transplanting. This settles soil around roots and removes air pockets.
Mulch after the soil has warmed, usually 7-10 days after transplanting. Apply 2-3 inches to stabilize moisture and reduce soil splash onto leaves.
Soil Basics for Healthy Tomato Growth
Healthy soil supports root expansion and nutrient availability.
Ideal Soil Structure
Loose, well-draining soil rich in organic matter supports steady growth. If the soil is heavy clay, mix in compost before planting. Compacted clay restricts root expansion and oxygen exchange. Raised beds provide improved drainage in heavy soils
Avoid fresh manure; it pushes leafy growth at the expense of fruit.
Ideal pH Range
Tomatoes prefer slightly acidic soil with a pH between 6.0 and 6.8.
- A value below 6.0 reduces nutrient availability
- Above 7.0 may cause micronutrient lockout
Simple soil test kits provide guidance.
Improving Poor Soil
- Add 2-3 inches of compost annually
- Avoid over-amending with nitrogen-rich materials
Watering Tomatoes the Right Way
Water management influences fruit quality more than almost any other factor.
Deep Watering vs Shallow Watering
Deep watering encourages roots to grow downward, making plants more heat-tolerant. Shallow frequent watering creates weak root systems prone to heat stress.
Consistent soil moisture matters more than watering frequency. Tomatoes tolerate slightly dry soil better than repeated wet-dry swings.
Water deeply instead of sprinkling a little every day. The goal is to moisten soil 6-8 inches deep, then wait until the soil feels dry about 2 inches down before watering again.
In hot weather, this may be every 2-3 days; in mild weather, less often.
Afternoon leaf drooping that recovers by evening is a normal heat response, not always underwatering.
Watering During Fruit Development
Inconsistent watering causes:
- Cracked fruit
- Blossom drop
- Misshapen tomatoes
During heat waves, increase watering slightly but avoid waterlogged soil.
Signs of Overwatering
- Yellowing upper leaves
- Wilting in wet soil
- Slow growth
Overwatering reduces oxygen at the root level.
Signs of Underwatering
- Leaf curl
- Blossom drop
- Fruit cracking
Irregular watering is more harmful than slightly dry soil.
Fertilizing for Strong Growth and Fruit Production
Tomatoes are heavy feeders, but more fertilizer does not automatically mean more fruit. The goal is steady, balanced nutrition that supports early growth and then shifts toward fruit production.
Feeding During Early Growth
- At planting, compost or balanced fertilizer is enough
- Avoid excessive nitrogen early in the season and once flowering begins. Too much nitrogen produces lush leaves but delays flowering.
- Feed lightly every 3-4 weeks until flower buds appear
Container Feeding Adjustments
Containers lose nutrients faster because frequent watering washes them out of the soil mix. Tomatoes grown in pots typically need lighter but more frequent feeding than in-ground plants.
Use a balanced liquid fertilizer every 10-14 days once plants begin active growth. When flowering starts, switch to a formula lower in nitrogen and higher in phosphorus and potassium.
Avoid heavy, infrequent feeding. Salt buildup in containers can damage roots and reduce fruit quality.
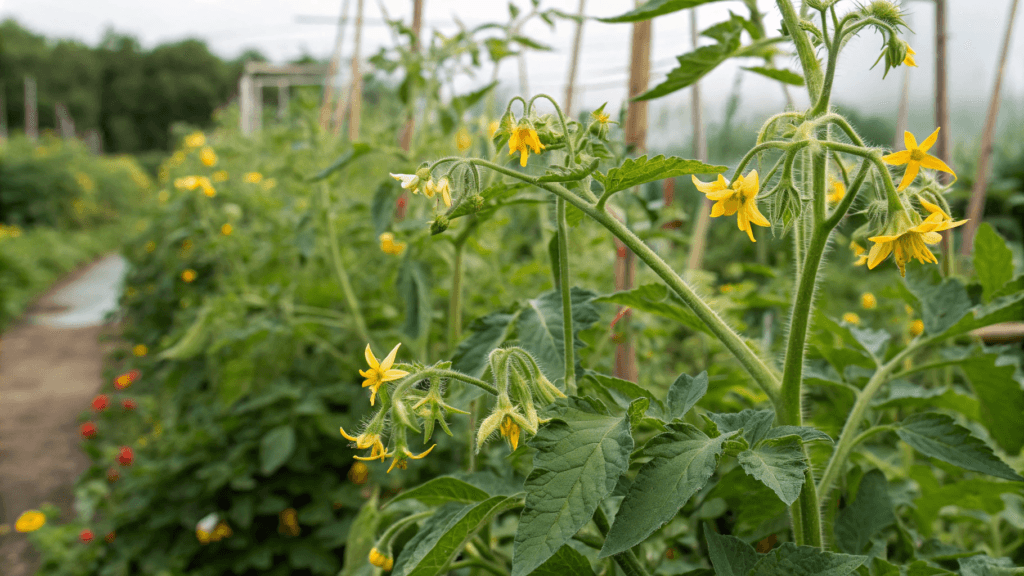
Managing Tomatoes During Flowering and Fruiting
Flowering and fruiting determine how many tomatoes you actually harvest. During this stage, feeding, watering, and temperature directly affect fruit set, size, and overall yield.
Switching to Fruit-Focused Feeding
Once flowers appear, reduce nitrogen and switch to a fertilizer higher in phosphorus and potassium. This shift supports fruit development instead of excess leaf growth. Feed every 2-3 weeks during heavy fruiting, adjusting based on plant vigor.
If plants are tall and leafy but not producing fruit, nitrogen may be too high.
Fruit set depends on temperature as much as feeding. Extended heat during flowering often reduces pollination and causes blossom drop.
In hot weather, steady watering and light shade can improve fruit set.
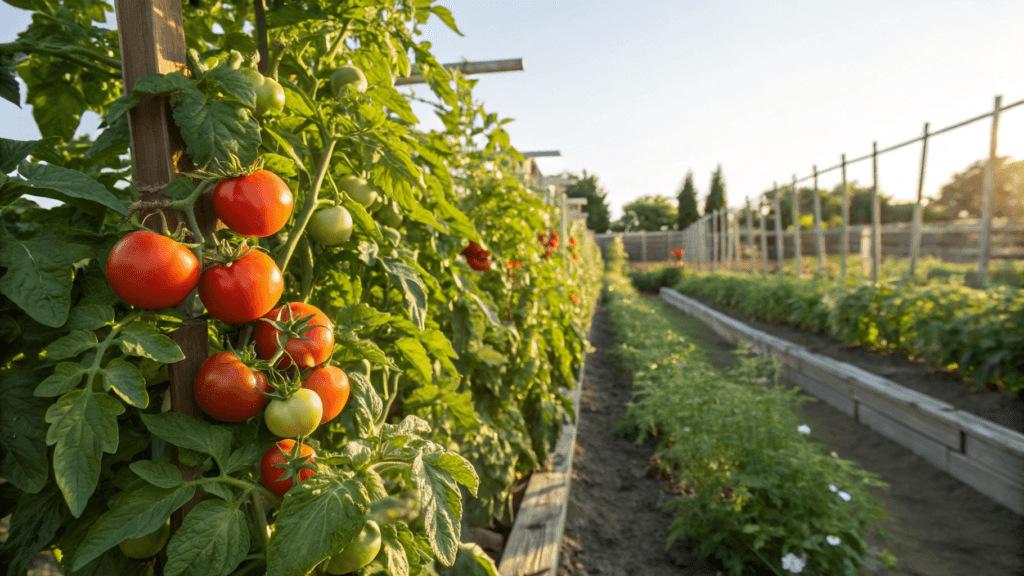
Supporting and Pruning Tomato Plants
Supporting and pruning tomatoes keeps plants upright, improves airflow, and reduces disease pressure. Without structure, plants quickly become tangled and difficult to manage once fruit production begins.
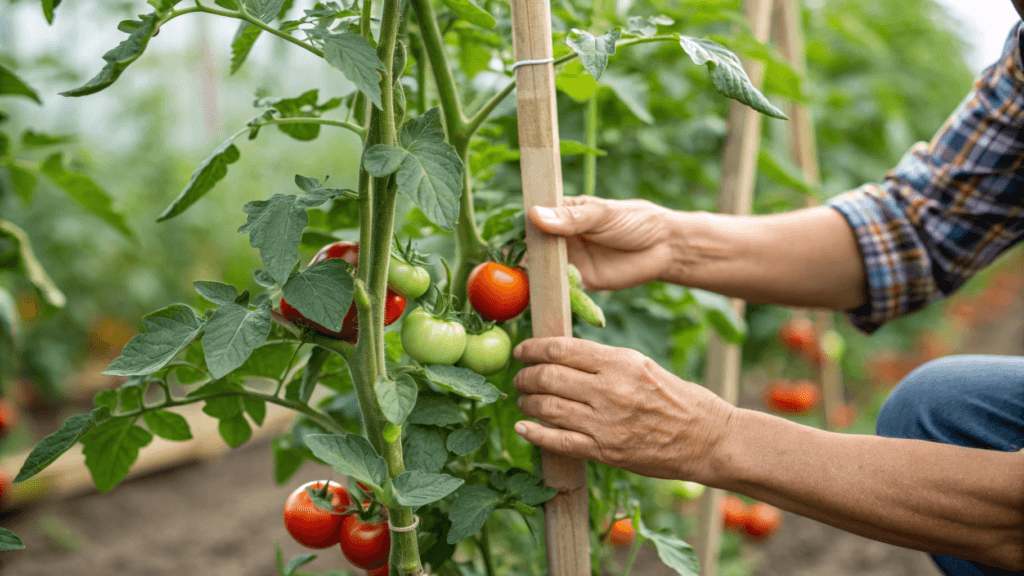
Installing Support Early
Install support at planting time, not later. Pushing stakes into the soil after roots have spread can damage the root system and slow growth.
- Determinate: Use a sturdy cage that supports the plant’s full height.
- Indeterminate: Use a 6-8 foot stake or strong trellis system that can handle continuous vertical growth.
Secure stems loosely with soft ties to allow expansion as the plant thickens. Proper support keeps plants upright during storms, improves airflow, and prevents fruit from resting on the soil.
Well-supported plants are easier to prune, harvest, and inspect for pests and disease.
Cages vs Stakes vs Trellis
Cages are the simplest option for determinate tomatoes. They support the plant’s natural bush shape and require minimal pruning.
Stakes work well for indeterminate varieties when you plan to prune to one or two main stems. They save space and improve airflow but require regular tying and maintenance.
Trellis systems are ideal for larger gardens or multiple indeterminate plants. They provide strong vertical support and make harvesting easier, especially late in the season.
How to Prune Indeterminate Tomatoes
Pruning improves airflow, reduces disease pressure, and helps direct energy toward fruit production.
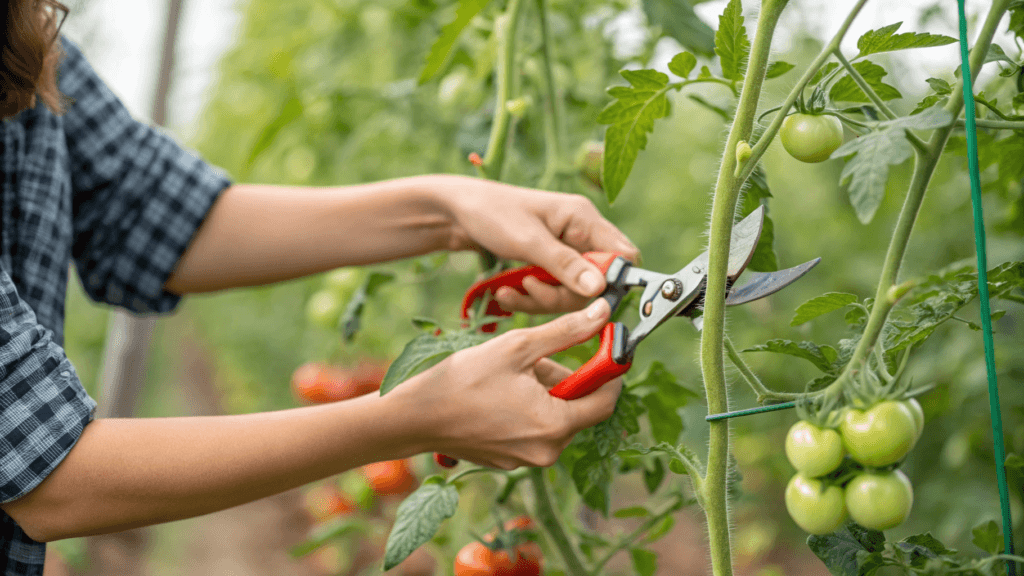
Remove suckers growing between the main stem and leaf branches. Small suckers are easier to remove than thick ones later in the season.
For easiest care, train indeterminate tomatoes to 1-2 main stems. Keep the lowest leaves off the soil line, and stop removing leaves once fruit needs shade to prevent sunscald.
Pruning also:
- Keeps plants easier to manage
- Improves light penetration
- Makes harvesting simpler
Should You Prune Determinate Tomatoes?
Determinate tomatoes require minimal pruning because they set most of their fruit at once. Removing too much foliage can significantly reduce total yield.
Focus only on:
- Removing damaged or diseased leaves
- Removing leaves touching the soil
- Light thinning if the airflow is extremely poor
Avoid removing healthy suckers, since each one can produce additional fruit on determinate plants.
Growing Tomatoes in Containers (When Space Is Limited)
Tomatoes grow well in containers, but root space and consistent moisture become even more important than in-ground planting. Most container problems come from pots that are too small or soil that drains poorly.
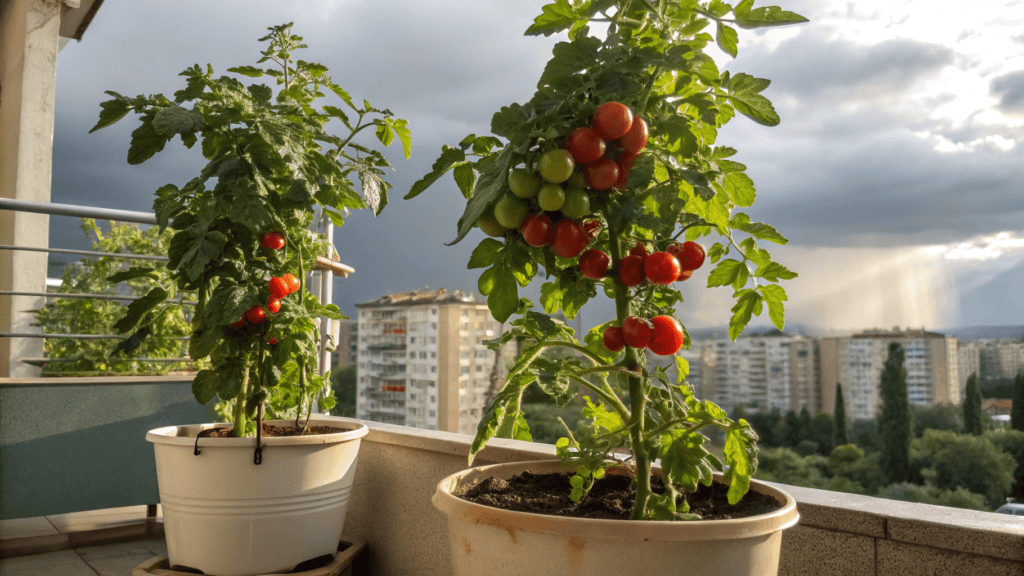
Minimum Container Size
- Use at least a 5-gallon container for compact or determinate varieties.
- For indeterminate tomatoes, choose 10-15 gallons for stable growth and higher yields.
Small containers restrict roots, dry out quickly, and reduce fruit production.
Soil and Drainage Requirements
Use a high-quality potting mix, never garden soil. Garden soil compacts in containers and suffocates roots.
Make sure the container has multiple drainage holes. Excess water must be able to escape freely.
Watering and Feeding in Containers
Containers dry out much faster than garden beds. In hot weather, daily watering may be necessary.
Because frequent watering washes nutrients out, feed more consistently using a diluted, balanced fertilizer. Light, regular feeding works better than heavy, occasional doses.
Companion Plants for Tomatoes
Companion planting can support pest balance and improve space efficiency, but it does not replace proper spacing, pruning, or airflow.

Good Companions
- Basil helps deter certain pests and grows well in similar soil.
- Marigolds are often used to discourage nematodes and attract beneficial insects.
- Lettuce is shallow-rooted, making good use of space beneath taller tomato plants.
- Carrots grow vertically in the soil without competing heavily for nutrients above ground.
These plants coexist without aggressively competing for root space or sunlight.
Plants to Avoid Near Tomatoes
- Other nightshades (peppers, eggplant, potatoes) share similar diseases.
- Fennel can inhibit the growth of nearby plants.
Avoid crowding tomatoes with large, heavy-feeding crops that compete for nutrients and airflow.
How to Increase Tomato Yield Naturally
Higher yields usually come from stability rather than extra fertilizer. Maintain consistent watering, harvest frequently, remove overcrowded interior growth, and keep lower foliage off the soil to reduce plant stress during fruit production.
Common Tomato Growing Problems
Even well-grown tomato plants can develop issues during the season. Most problems are not random; they’re usually linked to temperature swings, watering inconsistencies, nutrient imbalance, or poor airflow.
When you identify the cause early, most tomato problems can be corrected before they affect your harvest.
Early Blight and Leaf Spot
Brown spots on lower leaves that gradually move upward are often signs of early blight or septoria leaf spot.
Remove affected lower leaves promptly, improve airflow, and avoid overhead watering.
Apply mulch to reduce soil splash, which spreads fungal spores from the soil onto the foliage.
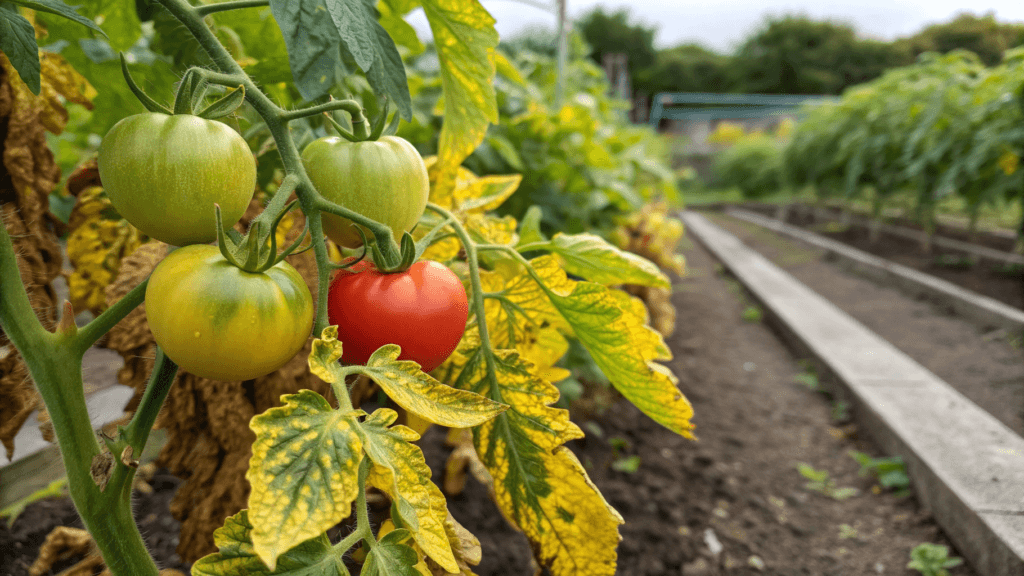
Yellow Leaves (Top vs Bottom Differences)
Lower leaves often yellow naturally as the plant matures, especially once fruiting begins. Remove them if they are old and no longer productive.
Yellowing on upper leaves usually signals nutrient imbalance, overwatering, or inconsistent moisture. Check watering first, then adjust feeding if new growth remains pale.
Blossom Drop (Heat, Stress, Water Issues)
Blossom drop occurs when flowers fail to set fruit, most commonly due to heat or moisture stress.
Tomato pollination declines when daytime temperatures stay above ~90°F (32°C) or nighttime temperatures remain above ~75°F (24°C).
Keep watering consistently during heat waves, provide light afternoon shade if possible, and gently shake flower clusters midday to improve pollination.
No Fruit Production
When plants grow tall and leafy but produce few or no tomatoes, the cause is usually excess nitrogen or insufficient sunlight.
Too much nitrogen encourages foliage growth at the expense of flowering. Limited sun reduces energy available for fruit production.
Reduce high-nitrogen feeding and ensure plants receive at least 6–8 hours of direct sun daily.
Cracked or Misshapen Fruit
Cracked or misshapen tomatoes usually result from inconsistent watering, especially when heavy rain or irrigation follows a dry period. Rapid fruit expansion causes the skin to split.
Maintain steady soil moisture and mulch to reduce sudden moisture swings.
Blossom-End Rot (Black Spot on the Bottom of Fruit)
Blossom-end rot appears as a dark, sunken spot on the bottom of the fruit. It is usually caused by inconsistent moisture, not a simple calcium deficiency.
Calcium moves through the plant with water flow. When soil moisture fluctuates, calcium transport becomes irregular, even if soil calcium levels are technically adequate.
Keep watering steadily, mulch once the soil is warm, and avoid heavy nitrogen feeding that pushes rapid growth.
Common Tomato Pests
Tomato pests often target tender growth, leaves, or developing fruit. Early detection makes control much easier.
Tomato Hornworms
Large green caterpillars that strip foliage quickly. Hand-pick when visible and encourage beneficial insects such as parasitic wasps.
Aphids
Small insects that cluster on new growth and the undersides of leaves. Spray with a strong stream of water or use insecticidal soap if infestations persist.
Whiteflies
Common in warm climates and greenhouses. Improve airflow, reduce overcrowding, and use yellow sticky traps if needed.
Spider Mites
Tiny pests that cause speckled or dusty-looking leaves, especially in hot, dry conditions. Increase humidity around plants and spray the undersides of leaves with water regularly.
Cutworms
Young plants may be cut at the soil level at night. Protect seedlings with collars at transplanting.
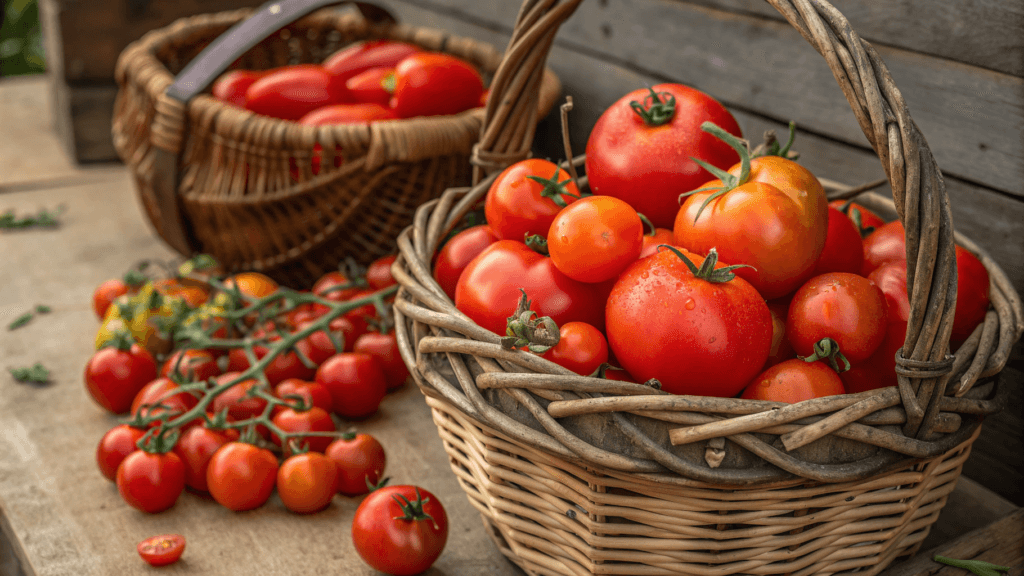
When and How to Harvest Tomatoes
Harvest timing affects both flavor and plant productivity. Picking at the right stage helps prevent cracking, pest damage, and overripe fruit.
Color Stages (Breaker Stage Explained)
The breaker stage occurs when the fruit begins changing from green to its final color. At this point, internal ripening has started, and tomatoes can finish ripening safely off the vine.
Harvesting at the breaker stage reduces the risk of splitting, sunscald, and pest damage.
Vine Ripening vs Counter Ripening
Vine-ripened tomatoes often develop a slightly deeper flavor. However, allowing fruit to finish ripening indoors can protect it from cracking, birds, and extreme heat.
Choose based on weather conditions and pest pressure.
Never pull fruit forcefully from the vine, as tearing can damage future flower clusters.
How Often to Harvest for Maximum Yield
Harvest every few days during peak production. Regular picking encourages continued flowering and fruit set, especially on indeterminate varieties.
Use pruning shears or twist fruit gently to avoid damaging stems.
How to Store Fresh Tomatoes
Proper storage preserves both flavor and texture. Tomatoes continue to ripen after harvest, and temperature affects that process.

Counter Storage for Best Flavor
Store tomatoes at room temperature, away from direct sunlight. Keep them stem-side down and avoid stacking to prevent bruising.
Room temperature allows full flavor development and better texture.
When Refrigeration Is Acceptable
Refrigerate only fully ripe tomatoes if necessary to prevent overripening. Bring them back to room temperature before eating to improve flavor.
Cold temperatures slow flavor development and can dull texture.
Freezing and Preserving Options
Tomatoes can be frozen for cooked dishes such as sauces and soups. Skins slip off easily after thawing.
Freezing changes texture, so frozen tomatoes are best used in cooking rather than for fresh eating.
End-of-Season Care and Cleanup
Еnd-of-season cleanup reduces disease pressure and prepares the soil for a stronger crop next year.
Removing Plants to Prevent Disease Carryover
Remove tomato plants after frost or once production declines significantly. Leaving diseased foliage in the garden allows fungal spores and pests to overwinter.
Pull plants completely, including major root systems when possible.
Composting vs Disposal
Compost only healthy plant material. If plants showed signs of blight, severe leaf spot, or heavy pest infestation, dispose of them instead of composting to prevent reinfection.
Preparing Soil for Next Year
Add 2-3 inches of compost after cleanup and rotate crops to a different bed for at least 2-3 years.
Avoid planting tomatoes or other nightshades in the same location the following season.
Beginner Mistakes to Avoid
Most tomato problems trace back to a few preventable mistakes:
- Planting into cold soil before it reaches 60°F
- Overcrowding plants and restricting airflow
- Watering inconsistently, especially during fruiting
- Feeding too much nitrogen once flowering begins
- Installing support too late and damaging the roots
Avoiding these common errors prevents the majority of disease, cracking, blossom drop, and low-yield issues.
Quick Tomato Success Checklist
- Soil fully warmed before planting
- Strong support was installed early
- Plants spaced for airflow
- Deep watering instead of daily sprinkling
- Fertilizer is reduced after flowering begins
Conclusion
Growing tomatoes doesn’t have to feel complicated. When you plant them in warm soil, bury the stem deep, give them enough space and sun, water them steadily, and adjust feeding once they start flowering, most problems simply don’t happen. Yellow leaves, cracked fruit, or plants with lots of leaves but no tomatoes usually come from cold soil, crowding, uneven watering, or too much nitrogen.
Tomatoes respond quickly to steady, attentive care. Build strong roots early, keep watering consistently through the season, and support the plants before they get heavy. When these basics are handled well, tomatoes become one of the most productive crops in the garden year after year.

Leave a Reply