Painting veneer cabinets is an excellent way to refresh your space. With careful preparation—cleaning, sanding, priming, and painting—you can achieve a lasting professional look.
Remember to take your time, use the right materials, and enjoy the process.
Read more about how to paint veneer cabinets below.
Table of Contents
What Exactly Are Veneer Cabinets?
Before getting started, it’s important to understand what veneer is. Unlike solid wood, veneer cabinets are made from a thin layer of wood (or laminate) applied over particleboard or MDF (medium-density fiberboard).
Because of this, the painting process requires a bit more finesse. The veneer is smoother and less porous than wood, so extra prep is needed to ensure the paint sticks and doesn’t peel later.

Can You Paint Veneer Cabinets?
Yes, you can! It’s a budget-friendly way of transforming the look of your kitchen or bathroom without the expense of a complete remodel or putting together new furniture, waiting for deliveries, and so on.
Plus, if done correctly, your veneer cabinets will look just as beautiful as freshly installed ones.

When I first attempted to paint a little cabinet, I was hesitant about painting veneer because I thought it would just swell up or not look as good as real wood.
I’m not going to lie, my first attempt was not perfect because I didn’t take the time to clean very well, sand, or prime properly. Big mistake! I thought all I needed was paint and a brush, and the job would be finished.
The paint started peeling within a few months, maybe it’s because I was using dust spray to clean them (maintaining them) and didn’t sand and apply the prime on the cabinets before painting.
But after doing some research (and learning from my own mistakes), I gave it another shot, and this time, I followed all the proper steps: cleaning, sanding, using a good bonding primer, and applying two thin coats of quality paint.
Just remember, patience is key. It’s all about prepping the surface correctly, using the right primer and paint, and letting each layer dry thoroughly. Done right, your veneer cabinets will look fresh, modern, and professional.
Continue reading to see how to paint veneer cabinets – step by step!
Materials You’ll Need
Before starting the project, make sure you have all the necessary materials. Having everything ready in advance saves you from interruptions, allowing the project to go smoothly.
Tools and Supplies:
- Screwdriver (to remove doors)
- Degreaser or mild detergent for cleaning
- Fine-grit sandpaper or sanding sponge (180-220)
- Filling blade
- Masking tape
- Primer (bonding or adhesion primer works best for veneer)
- Quality paint (satin, semi-gloss, or gloss finish)
- Paint tray
- Paintbrush / Paint foam rollers / Foam brushes
- Plastic tarp to protect your work area
- Tack cloth or microfiber cloth for dusting
Optional Supplies:
- Electric sander for a quicker sanding process
- Paint sprayer for a smoother finish
- New hardware (if you want to give the cabinets a fresh look)
- Protective masks and goggles
- Wood filler (optional for any imperfections or dings)
How to Paint Veneer Cabinets – Step-by-Step Guide
Step 1: Remove Cabinet Doors and Hardware
The first step is to take off all cabinet doors, drawers, and hardware. Also, remove all items and kitchen tools, and set them aside. This will give you easier access to every surface and ensure that paint doesn’t accidentally get on the hinges and handles.

Tip: Label each door, drawer, and hardware with painter’s tape or sticky notes so you know exactly where everything goes when it’s time to reassemble. Whenever we do this kind of renovation at home, I try to keep everything organized because things always seem to get lost in the mess.
Step 2: Clean the Surface Thoroughly
Veneer cabinets can accumulate grease, grime, and dust, especially in kitchens. Start by thoroughly cleaning the cabinets with a degreaser or a mixture of warm water and mild detergent, or vinegar and soda, because the primer and paint won’t stick properly.

Wipe down every surface, making sure to get into all the corners. Use a plastic tarp or masking tape around the cabinets to protect your floors, walls, and work area.
Step 3: Sand the Veneer
Sanding is crucial for helping the primer and paint stick to the veneer surface. Use fine-grit sandpaper (180-200 grit) or a sanding sponge to scuff the surface lightly. I prefer to use sanding sponges because they have an easier grip.

The goal here isn’t to sand through the veneer, but just to smooth it up enough for the primer to adhere properly. Be sure to sand the doors, drawer fronts, and face frames. I suggest wearing protective masks and goggles to prevent inhaling dust.
If you have defects on the surface of the cabinets, now is the time to fill them with wood filler. Once the filler hardens, use finer sandpaper to smooth out any unevenness and avoid damaging the surface.
Using finer sandpaper is recommended because it reduces the risk of causing excessive abrasion to your veneer surfaces. Keep in mind that, unlike plywood, timber veneers are much thinner, so excessive sanding may expose the substrate beneath the veneer.
After sanding, clean the surface very carefully to remove dust particles.
Step 4: Apply a High-Quality Primer
Next up is priming, which is the most important step to ensure a smooth and long-lasting finish. Use a high-adhesion primer that’s designed for slick surfaces like veneer. Bonding primers work particularly well.
Apply a thin, even coat with a foam roller or a sprayer for a flawless base. Use a paintbrush for smaller areas, such as cabinet frames, and for larger areas, such as cabinet doors and drawers, you can use a paint foam roller or paint sprayer.
Tip: Don’t rush this step. Let the first coat of primer dry for the recommended time on the can before moving on to painting. One coat of primer is often enough; however, many masters suggest applying two coats and allowing each to dry completely in between coats. I don’t always have the patience to wait that long, and the result is just as good with one coat.
Step 5: Choose the Right Paint and Apply It
Once your primer is fully dry, it’s time to paint. Now it’s time to apply your first coat. Do a bit of research to find the best paint brand and type that fits your needs and preferences.

For veneer cabinets, it’s best to use high-quality paint in a semi-gloss or satin finish. I recommend using 100% acrylic, semi-gloss latex paint. This paint is durable and easy to clean, and gives your cabinets a smooth, long-lasting finish, making it ideal for kitchens and bathrooms.
Pour your paint into a paint tray and start painting. Using a foam roller gives a smoother finish without leaving brush marks so I recommend using it for large areas and a high-quality paint brush for edges and corners.
- Foam rollers leave a smoother finish than traditional nap rollers.
- For even better results, you might consider using a paint sprayer.
Apply the paint in two thin coats instead of one thick to avoid drips and imperfections, rather than using one thick coat that can look uneven. Allow each coat to dry completely before applying the next.
Unlike primer, where I don’t have the patience to wait for two coats to dry, here it’s better to wait and see how each coat improves the previous. Repeat this process until the cabinets look just like you like them. It takes time and patience, but the result is well worth the effort.
If you see any imperfections or paint drips, gently sand the area with fine sandpaper and clean off the dust before applying the next layer. Once the final layer is completely dry, carefully remove the masking tape you applied earlier.
Top 3 Best Paint For Veneer Cabinets
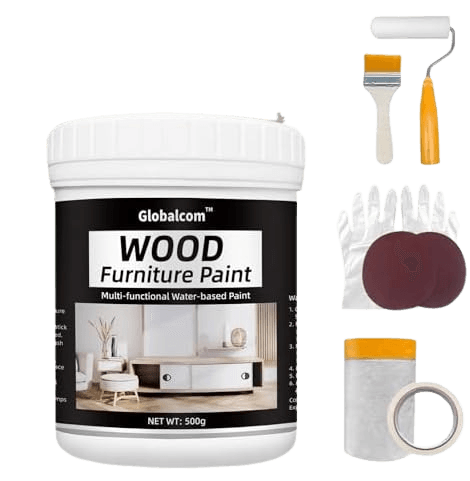
- Globalcom Acrylic Wood Paint for Furniture
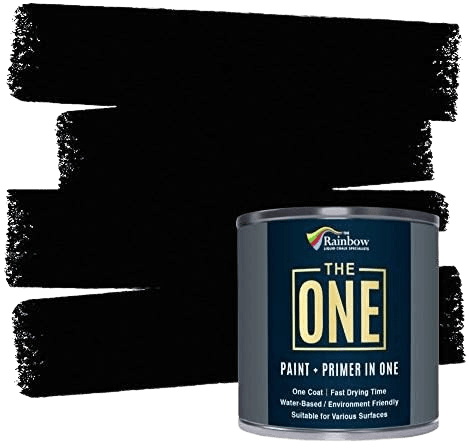
- THE ONE Paint & Primer: Most Durable All-in-One Furniture Paint
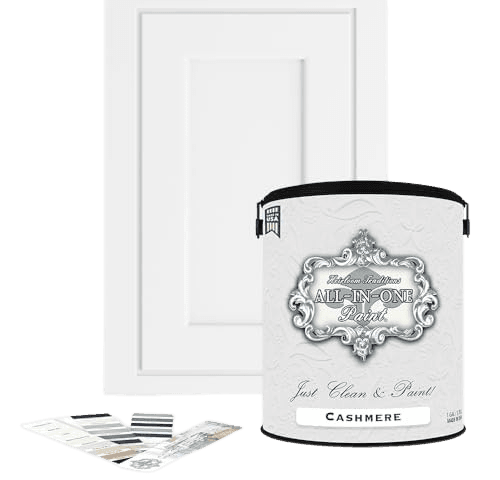
- ALL-IN-ONE Paint, Cashmere (True White), 128 Fl Oz Gallon
Step 6: Apply Varnish or Paint Sealant (OPTIONAL)

Apply varnish or paint sealant if needed. Once all your paint coats are dry and evenly applied, seal the paint to protect your timber veneers from dust and other contaminants that could damage the surface.
Step 7: Reassemble the Cabinets
Once the paint has fully dried (usually 24-48 hours), you can reattach the doors, hardware, and anything you removed. If you’re updating the hardware, now’s the perfect time to install the new pieces for a refreshed look.
It’s a small detail, but it can make a huge difference in the overall look of your freshly painted cabinets. I did this with my kitchen and bedroom cabinets and was surprised at how much new handles elevated the whole space. Plus, installing new hardware is a breeze—just make sure you measure carefully!
Helpful Tips for Painting Veneer Cabinets
Painting veneer cabinets might sound intimidating at first, but with a few key tips, you can make the process much smoother—and more enjoyable. Here are some helpful tricks I’ve picked up with my experience over the years to make sure you get a great finish that lasts.
1. Don’t Skimp on the Prep Work
The prep work makes all the difference. Veneer surfaces are smooth, so they don’t hold paint well unless you prep them properly. This means cleaning them thoroughly (especially if they’re in the kitchen, where grease can build up) and lightly sanding them to scuff up the surface.
One time I got a little impatient—thinking, “How dirty could they be?” I skipped a thorough cleaning and, sure enough, the paint didn’t stick in a few spots because there was some grease left behind. Lesson learned! Now I always wipe down with a degreaser first.
2. Use the Right Primer
Using a high-quality primer is crucial. Veneer cabinets are not as porous as wood, so you need a bonding or adhesion primer that’s made specifically for smooth surfaces. This ensures your paint will stick properly.
Think of primer as the glue between your cabinet and the paint. Without it, the paint might just slide off or peel over time. Always use a primer—even if it means an extra day of work, it’s worth it.
3. Go for Thin Coats
One of the easiest mistakes to make is putting on thick coats of paint, thinking it will speed up the process. It doesn’t. It leads to drips, uneven texture, and a longer drying time.
Instead, apply two (or even three) thin coats. Trust me, it will look much smoother, and the paint will hold up better in the long run. If you slap on a thick layer of paint, it looks streaky and dripped in some places, and you can end up having to sand and repaint sections. Stuck to thin coats, and the results will be so much better.
4. Let Each Layer Dry Completely
I get it – when you’re in the middle of a project, it’s tempting to move quickly and get everything done in one go. But patience is key. Letting each coat of primer and paint dry fully before moving on to the next is one of the best things you can do for your cabinets.
Think of it like baking. You wouldn’t frosting a cake while it’s still warm, right? The same goes for your cabinets. If you start applying the next layer of paint too soon, it can smudge, peel, or end up looking uneven.
5. Protect Your Space Like a Pro
Before you start, make sure to protect your countertops, floors, and any surrounding areas. Drop cloths and painter’s tape will be your best friends, trust me; taping things off properly will save you a ton of hassle later.
6. Foam Rollers Are The Best Tools
When it comes to applying the paint, foam rollers are game-changers for veneer cabinets. They give you a smooth, even finish without brush marks. Use a foam roller for large surfaces and a high-quality angled brush for the edges and tight spots. I used to use regular brushes for everything, but after switching to foam rollers, the difference was huge!
7. Don’t Forget to Label the Doors
This might sound basic, but when you remove your cabinet doors and drawers, label them. I use painter’s tape or sticky notes to number each door and drawer front, along with its corresponding cabinet frame. Trust me—this simple step will save you a lot of frustration when it’s time to put everything back together.
8. Be Patient with the “Cure Time”
After your cabinets are painted and reassembled, give them a week (or more) to fully “cure”. Even though they might feel dry after a few hours, it takes a while for the paint to harden completely. During that time, be careful not to scratch and be careful with cleaning.
I know the excitement of wanting to reassemble everything and get your kitchen back in action, but waiting for the paint to dry will ensure that it doesn’t chip or dent as easily later on.
9. Have Fun with It!
Remember, this is your project, and it’s all about making your space feel fresh and updated. Don’t stress about perfection. Every time I make a renovation, I remind myself that it’s okay if it’s not flawless—it’s about the overall transformation. Enjoy the process and be proud of the work you’re putting into your home!


 ChatGPT
 Perplexity
 Claude


Leave a Reply