 Perplexity
 Claude
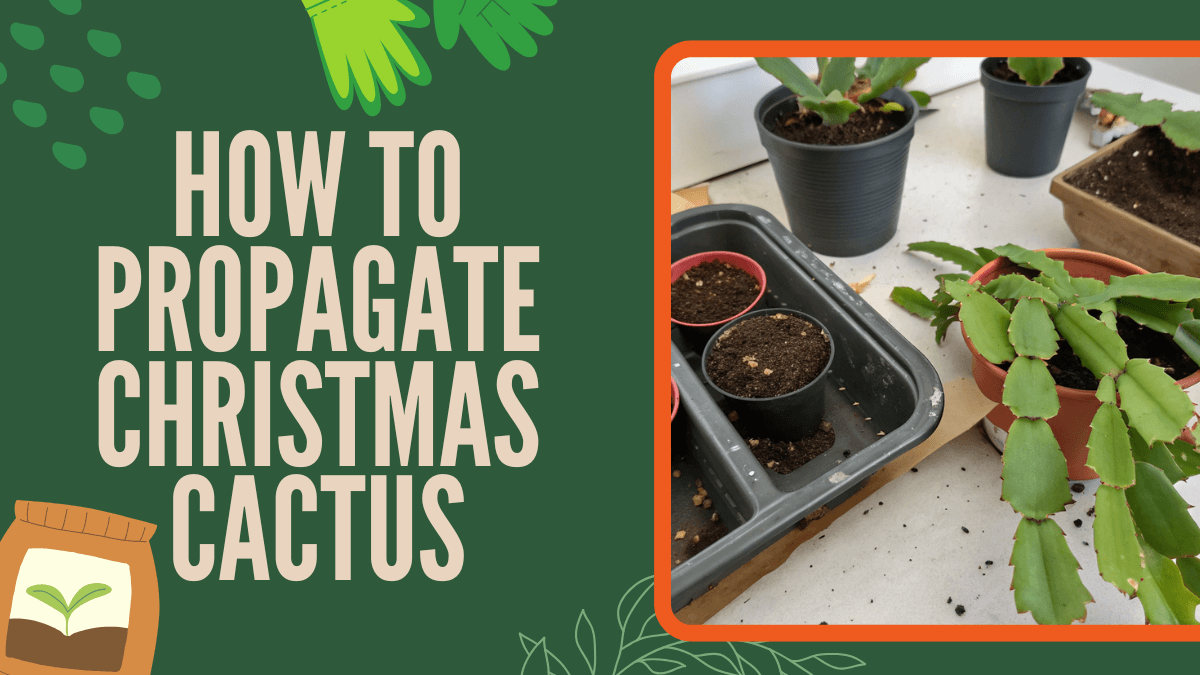
How to propagate Christmas cactus might sound tricky, but it’s actually super simple and kind of fun! If you’ve ever wanted to grow new plants from your existing cactus, share them with friends, or just add a little greenery to your home, you’re in the right place. With a few healthy cuttings, some water or soil, and a little patience, you can watch your tiny segments turn into full, thriving plants.
Christmas cactus cuttings root quickly and reliably as long as you follow a few basic steps.
Why Propagating Christmas Cactus Is Easy?
Unlike many succulents or cacti that require dry, harsh environments, the Christmas cactus (Schlumbergera) is a tropical plant that naturally grows in humid forests. That means it’s already predisposed to root quickly in either water or a light, airy soil mix.
Even better, this plant doesn’t need fancy hormones, heat mats, or complicated tools you can literally start with a clean pair of scissors and a small jar of water. Within a few short weeks, you’ll see roots forming and new segments developing.
Propagation is also a great way to:
- Preserve an older plant that’s getting leggy
- Share cuttings with friends and family
- Create uniform plants for décor or holiday gifts
- Rejuvenate a plant by trimming it back
When to Take Cuttings (Best Season)
Christmas cactus cuttings root best when the plant is in its active growing phase, which usually occurs in late spring through early summer. During this period, the plant is producing new growth and responds more quickly to propagation.
You can still take cuttings at other times of the year, but timing does affect rooting speed.
- Best time: Late spring to early summer
- Acceptable time: Early fall, before budding starts
- Worst time: Mid-bloom or right before bloom, cuttings taken then may struggle or cause your plant to drop buds
If your plant is flowering, wait until the blooms have faded before taking any segments.
How to Take Christmas Cactus Cuttings Properly
Taking a proper cut is crucial. It might seem as simple as snapping off a segment, but a little technique goes a long way.
What You’ll Need
- Clean scissors or pruning shears
- Rubbing alcohol (for sterilizing)
- A paper towel
- A small tray or clean surface
How to Take the Cutting
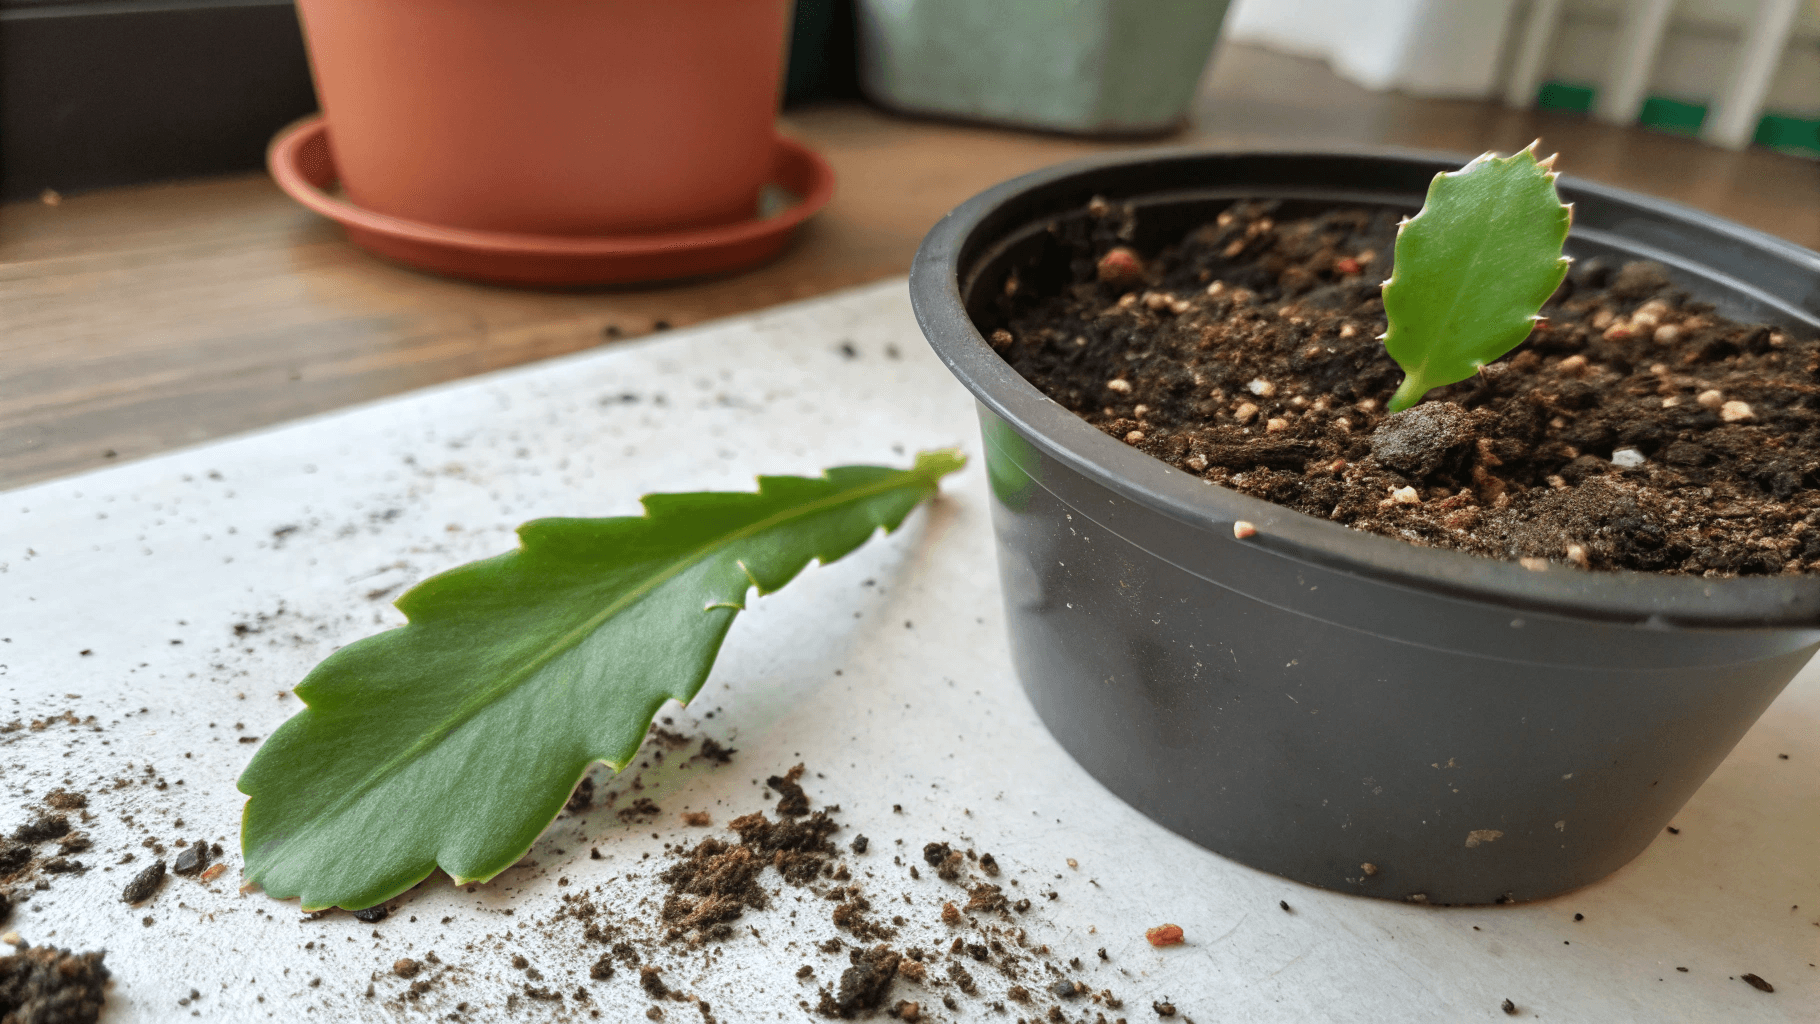
- Choose healthy cutting: Pick firm, bright green parts of the plant. Avoid wrinkled, yellowing, or damaged segments. Ideally, take a piece that’s 2-4 segments long. Shorter pieces may root more slowly or struggle to grow.
- Make a clean cut: Wipe your scissors or pruning shears with rubbing alcohol to prevent introducing bacteria or fungus.
- Cut at the joint between segments: You can either twist gently to snap it off or use scissors to snip. Avoid crushing the stem.
- Let the cutting dry: Lay it on a paper towel for 24-48 hours in a dry place. This allows the cut end to dry slightly, reducing the risk of rot when placed in water or soil.
Once your cutting is callused, it’s ready for either water or soil.
How to Propagate Christmas Cactus in Water
Water propagation is a favorite method because it’s fun to watch the roots grow. It also gives you clear visual confirmation of progress.

Pros
- Easy to monitor root growth
- Simple setup with minimal materials
- Great for beginners or kids
Cons
- Higher risk of water rot if water is not changed regularly
- Transplant shock can occur when moving to soil
- Roots grown in water are often thinner and more fragile
Materials Needed
- Small glass or jar
- Filtered water (tap water works if left out for 24 hours)
Water Propagation Method (Step-by-Step)
- Choose a clear container: A small glass or jar works well.
- Add a little water: Fill it just enough so that only the very bottom of the cutting touches the water. (Do NOT submerge the whole cutting.)
- Position the cutting: Make sure the cut end is the only part exposed to moisture. If the rest sits in water, it may become mushy.
- Place in bright, indirect light: Avoid direct sun, which can overheat the water.
- Change the water weekly: This keeps bacteria from building up and prevents rot.
- Watch for roots: Roots typically appear within 2-5 weeks, depending on temperature and season.
- Transplant once roots reach 1-2 inches: At this stage, the cutting is strong enough to handle soil.
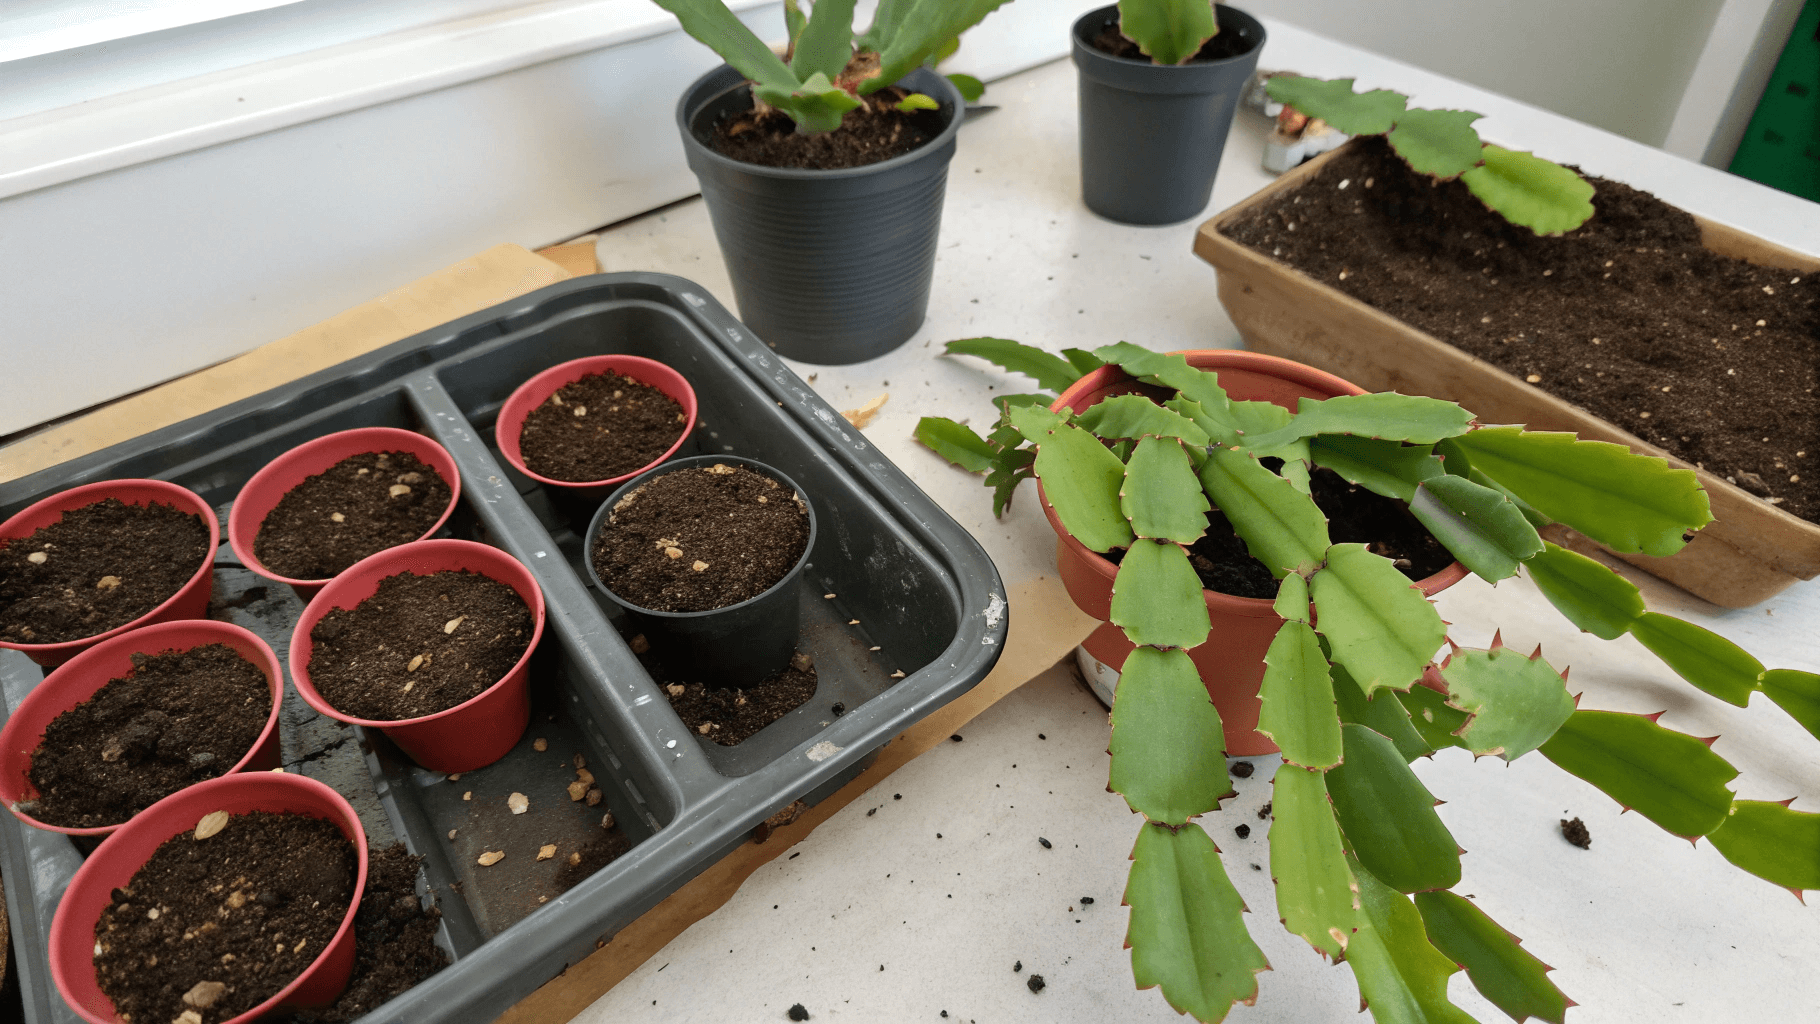
How to Propagate Christmas Cactus in Soil
Many gardeners prefer soil propagation because the roots grow thicker and adapt better to pot life. This method also skips the transplant shock that water-rooted cuttings sometimes experience.
Best Soil Mix for Christmas Cactus Cuttings
Christmas cactus loves a light, fast-draining mix. Here’s an ideal blend:
- 50% cactus/succulent mix
- 30% orchid bark
- 20% perlite
If you don’t have these ingredients, you can use:
- Regular potting soil mixed with equal parts perlite
- A pre-made cactus mix alone (still works fine)
Avoid heavy garden soil or standard potting soil alone, as it retains too much moisture and can cause rot.
Materials Needed
- Christmas cactus cuttings (2-4 segments long, callused)
- Small pots or containers with drainage holes
- Well-draining soil mix
- Spoon or a small tool for planting
- Spray bottle for light misting
Soil Propagation Method (Step-by-Step)
- Prepare a small pot: Choose a small container with drainage holes. Fill it with slightly damp soil (moist but not soggy).
- Insert the cutting: Plant your callused cutting about 1/2 inch deep into the soil. Press the soil gently around the base to support it upright.
- Place in bright, indirect light: Avoid direct sunlight, which can dry out the cutting or scorch the leaves.
- Mist the soil for the first 2-3 weeks with a spray bottle rather than heavy watering. Too much moisture can cause rot before roots develop.
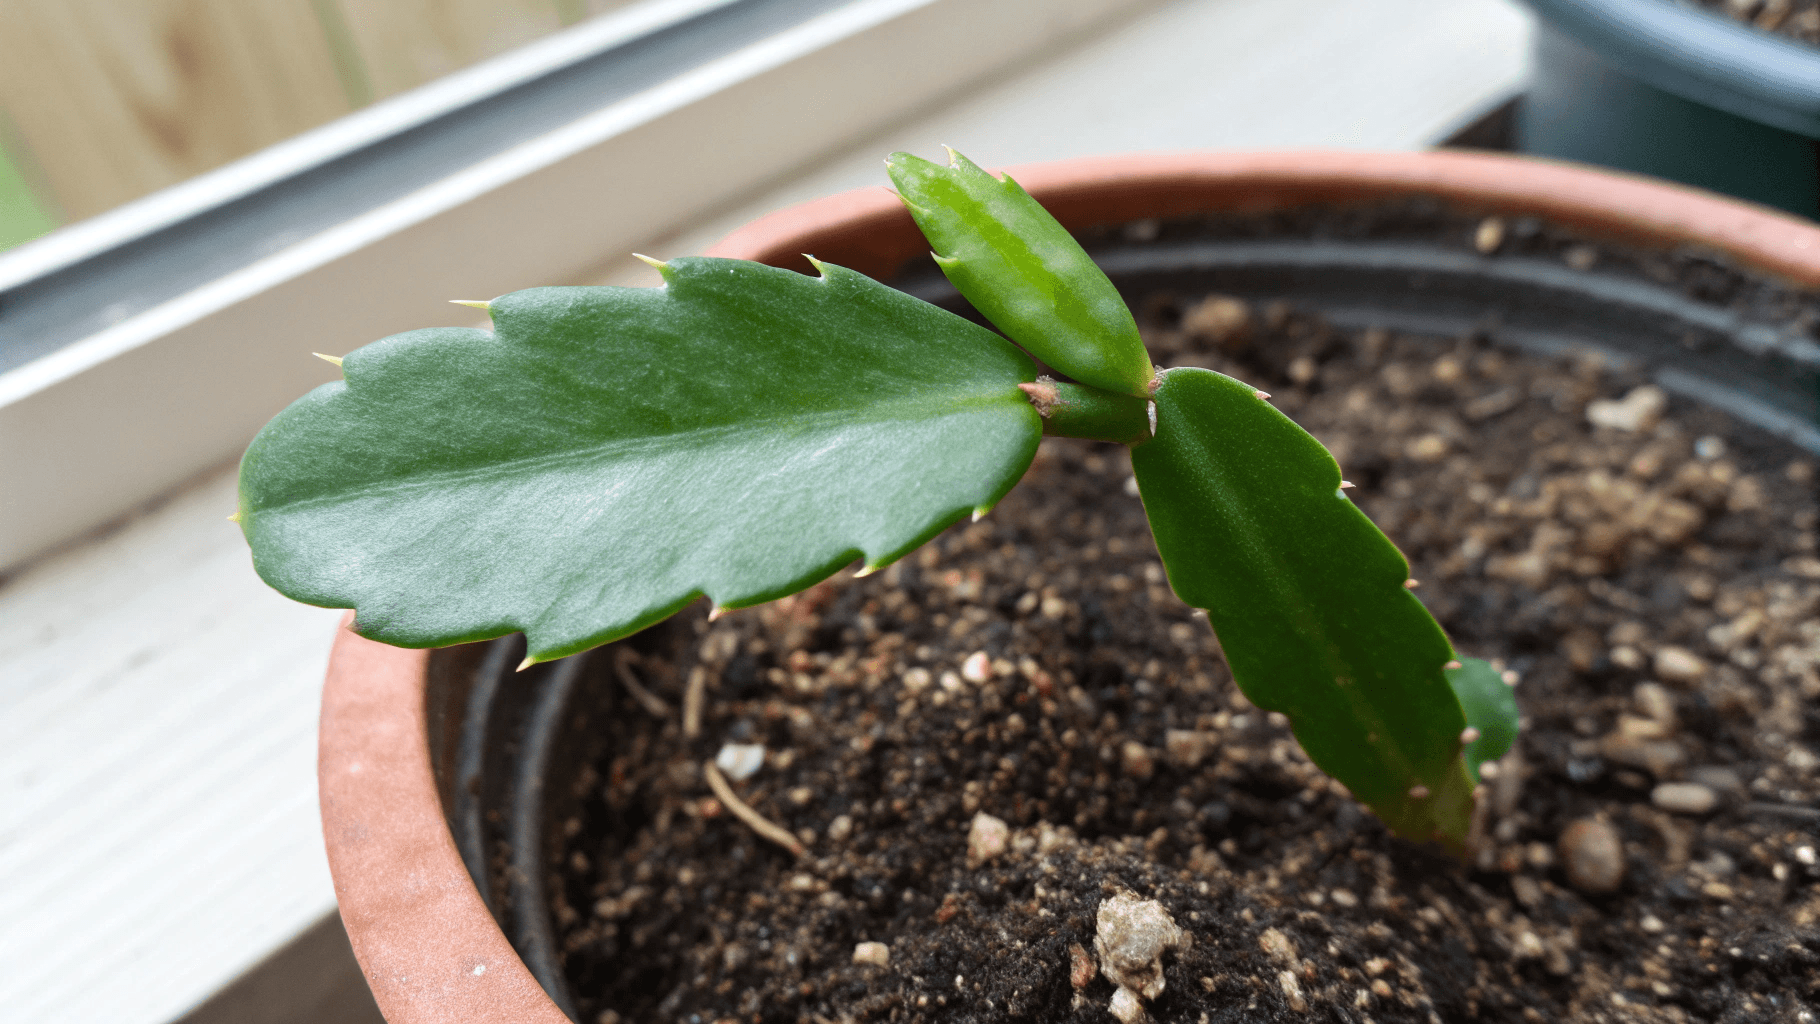
- Monitor root growth: After about 3 weeks, gently tug the cutting. A slight “hold” means roots are forming.
- Wait for new growth: By 4-6 weeks, new segments may appear, confirming that the cutting has successfully rooted.
- Transplant when ready: Once the cutting is firmly rooted and growing, move it to a slightly larger pot if needed.
Soil propagation often produces stronger plants in the long run, especially if you’re planning to grow them indoors full-time.
Christmas Cactus Root Growth Timeline
Every plant grows at its own pace, but here’s a general timeline to help you know what to expect.
Week 1
- Cutting calluses
- No visible changes yet
Weeks 2-3
- First tiny root nubs appear
- Water-propagated cuttings show roots faster
Weeks 4-6
- Solid root growth
- Soil cuttings start anchoring themselves
- New segment growth may begin
Weeks 6-10
- Fully rooted cutting
- Ready for a larger pot
- Can be treated like a mature plant
If your cutting shows no root activity after eight weeks, it may have dried out or rotted. Try again with fresh segments.
How to Transplant Rooted Cuttings
Whether your cutting rooted in soil or water, the transplant process is gentle and straightforward.
For Water-Rooted Cuttings
- Choose a small pot (3-4 inches) with drainage holes.
- Fill with a well-draining mix of cactus soil with extra perlite works great.
- Make a small hole and place the cutting inside.
- Cover the roots carefully and press the soil lightly.
- Water lightly once to settle the mix.
For Soil-Rooted Cuttings
- If the cutting is already in a small pot, simply let it grow until it becomes root-bound.
- When it’s ready for a bigger pot, use a container only one size up Christmas cactus prefers snug homes.
- Gently transfer the plant and add fresh soil around the edges.
After transplanting, give your new plant bright, filtered light and avoid heavy watering for about a week.
Common Propagation Mistakes (and How to Avoid Them)
Even though Christmas cactus propagation is simple, a few common mistakes can set you back. Here’s what to watch for:
1. Overwatering
Fix: Too much moisture is the quickest way to kill a cutting, especially before roots form. Aim for damp, not soggy soil.
2. Taking too-short cuttings
Fix: Single segments root slowly and may struggle to become full plants. Always choose 2-4 segments.
3. Not letting cuttings callus
Fix: Skipping the 24-48 hour drying period increases the risk of rot.
4. Using heavy potting soil
Fix: Regular potting soil without added perlite tends to stay wet for too long.
5. Direct sunlight
Fix: Cuttings burn easily. Indirect light is always best.
6. Transplanting too early
Fix: Wait until water roots reach at least 1-2 inches or until soil cuttings show noticeable new growth.
7. Allowing the cutting to wiggle
Fix: Unstable cuttings struggle to root. Make sure it’s firmly positioned in the soil.
Avoiding these mistakes boosts your chances of raising healthy, beautiful new Christmas cactus plants.
Conclusion
Propagating a Christmas cactus is one of the easiest ways to expand your indoor plant family. With just a few healthy segments, a clean cut, and either water or soil, you can grow thriving new plants in no time.
Whether you enjoy watching roots develop in water or prefer the stability of soil propagation, both methods work wonderfully, and the results make perfect gifts or personal additions to your home.

Leave a Reply