If you’re like me, you’re always looking for ways to make your garden or indoor plant collection bigger, better, and more beautiful – without spending a fortune. One of my favorite plants to propagate is the snake plant also known as Sansevieria. They are not only hardy and low-maintenance, but they’re also incredibly easy to propagate, which means you can turn one plant into many!
In this post, I’ll walk you through the 3 of the best ways how to propagate a snake plant, share a few tips I’ve learned along the way, and help you debug common issues.
Table of Contents
Can you Propagate a Snake Plant?
Yes, you absolutely can propagate a snake plant! The most essential thing you’ll need is a healthy snake plant. That means you can create numerous baby plants from one parent. This not only saves you money but also lets you share plants with friends and family or fill empty pots around your home.

First, look for a plant with strong, green leaves and a well-established root system. If your snake plant has started to outgrow its pot, that’s a good sign it’s ready for propagation! Snake plants can be propagated in 3 easy and proven methods, including through dividing rhizomes, leaf cuttings in soil, and leaf cuttings in water. Each method has its advantages, so it’s worth experimenting to find the one that works best for you.
If you want quick results, division is usually the most reliable method, but you can be a little more creative with leaf cuttings, whether they are in water or soil. Whether you choose soil or water propagation, snake plants are pretty forgiving, so give it a try. You’ll be amazed at how easy it is to multiply your favorite plant.
Bonus: Read the “History of Snake Plant” in our full article
Quick Overview: 3 Easy Snake Plant Propagation Methods
Snake plants can be propagated in three main ways:
- Water propagation: Place a leaf cutting in water until roots form.
- Soil propagation: Let a cut leaf dry, then plant it in well-draining soil.
- Division: Separate mature snake plant pups at the root base and replant them.
The Best Time to Propagate a Snake Plant
Many experts agree that spring or early summer are the ideal seasons for snake plant propagation. Then they’re in active growth mode, and you’ll see the quickest results. Since the process can take some time, you should start your propagation early to mid-spring to take full advantage of this period.
- I’ve tried it in different months of the year, and while it works and I haven’t seen a real difference except in the winter, the process is slower because the plant’s energy is focused on root development rather than leaf growth.
Snake plants love bright, indirect light and do best in warm spots around 70°F to 90°F (21°C to 32°C). Remember, snake plants grow slowly, so it can take 6-8 weeks for your cuttings to develop roots. Be patient – the good things take time!
What Tools Do You Need Before Propagating?
- Clean, sharp scissors or pruning shears. Use alcohol to sanitize your cutting instrument in advance to avoid the spread of infection.
- Clean pots and well-draining soil (cactus/succulent mix with perlite)
- Water containers (for water propagation); (jar or small vase)
- Healthy Snake Plant
- Rooting hormone (optional but helpful)
How to Propagate Snake Plant by Division of Rhizomes (Easiest and Most Reliable Methods)

If you’re looking for quick results, dividing your snake plant is the fastest and most reliable way to propagate.
Step-by-Step Process:
- Remove the snake plant from the pot.
- Find the mother plant’s underground stems or rhizomes.
- Carefully remove the soil from the roots with your hands.
- Using a sharp knife or sterilized scissors, carefully split them, ensuring each section has a healthy root system and leaves.
- Plant the new plant in a well-draining fresh succulent and cactus mix soil, which provides extra aeration for the roots.
- Place the plant in a place with bright sunlight (not direct) and water well, ensuring the soil stays moist and allows water to drain efficiently.
Just a reminder: Snake plants are toxic to both humans and pets, so place them in a safe spot away from curious hands and paws!
How to Propagate Snake Plant by Leaf Cuttings in Soil (Perfect for Multiplying Your Plant)

This method is great if you want to create several new plants from one leaf. It does take a bit longer than division, about 1-2 months, but it’s incredibly satisfying once you see new growth.
When I tried this method for the first time, I cut one leaf into several sections, so each piece became a new plant. Out of 5-6 sections, I ended up with 3-4 new plants.
Step-by-Step Process:
- Choose a healthy leaf and cut it near the base of the plant each about 2-3 inches (5-7cm). I typically cut mine at a V-shaped angle.
- Let the leaf dry out for 2-3 days. This step is very important because it helps prevent the leaf from rotting once it’s in the soil or if you prefer a quicker option, seasoning the cut area with cinnamon. Its natural antibacterial properties make it an excellent aid in preventing rot and infections.
- Plant the leaf about 1-2 (3-5cm) inches deep in well-draining soil. I suggest mixing sand with potting soil or adding extra perlite to your mix. Another option is to cover the pot with plastic cling wrap, which will create a greenhouse effect, helping the soil retain natural moisture and heat without the need to worry about overwatering or changes in room temperature.
- Water carefully and place the pot in bright indirect light.
Pro Tip: If you want to speed things up, you can dip the cut end of the leaf in rooting hormone before planting it. It’s not necessary, but it can help.
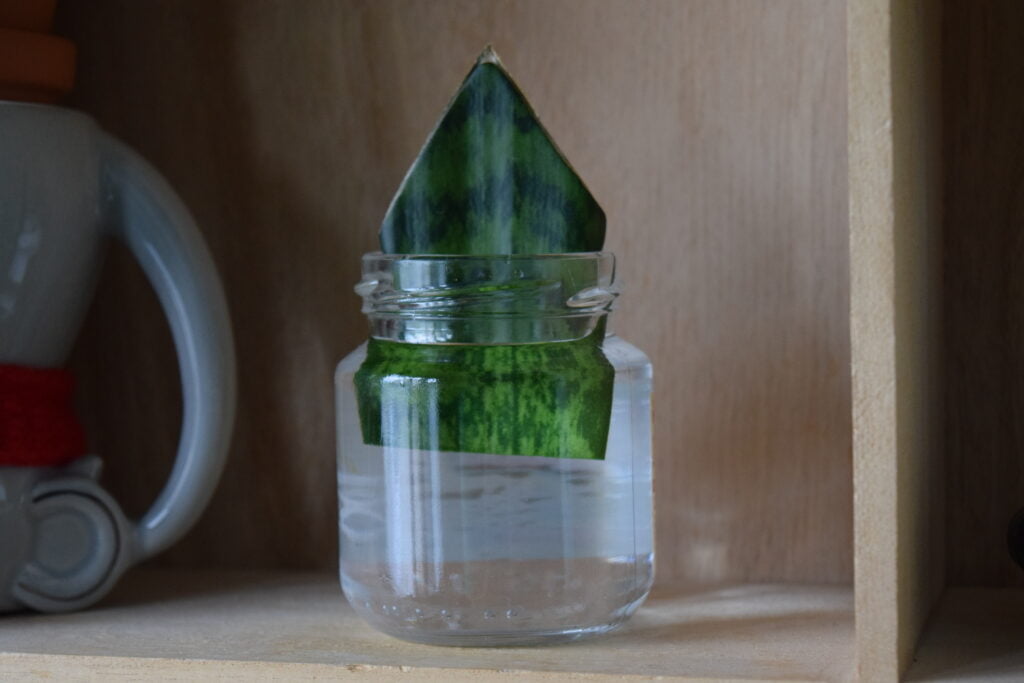
How to Propagate Snake in Water by Leaf Cuttings (A Visual Way to Propagate)

Water propagation is a bit slower than soil, but it’s incredibly fun because you can see the roots growing! You can keep an eye on the roots, and it’s a great conversation piece for your home. I keep mine on the kitchen windowsill so I can monitor the progress.
Step-by-Step Process:
- Cut a leaf into several 3-4 inch sections (7-10cm).
- Place the cut end of each section in a glass jar or little vase of room-temperature water, making sure it’s submerged and that the upper part of the leaf is dry.
- Place the jar in a room and make sure it receives enough bright indirect light.
- Change the water every 3-4 days to prevent bacteria from building up.
- After 8-10 weeks, you’ll see the first roots forming. Once they’re about 1-2 (3-5cm) inches long, you can transfer the cutting to the soil.
How to Care for Post-Propagation Plant
Once you have successfully propagated your snake plants, it’s important to provide them with light and water to support healthy and strong growth. Here are a few tips to keep them thriving:
1. Light
Newly propagated snake plants prefer bright, indirect light. Direct sunlight can be too harsh for the young cuttings, but too little light can stunt their growth. Find a nice place by a sunny window, but not in the full blast of the sun.
2. Watering
One of the easiest ways to kill a snake plant – especially a newly propagated one – is by overwatering. These plants store water in their leaves, so they don’t need to be watered very often. Let the soil dry out completely between waterings, maybe for 1-2 weeks. To prevent overwatering, I place the plant in a container of water, allowing it to absorb only as much as it needs.
3. Transplanting
Once your plant has outgrown its small pot, it’s time to move it to a larger one. You’ll know it’s ready when roots start to emerge from the drainage holes, or the plant seems to be struggling to hold itself up.
Common Mistakes When Propagating Snake Plants
- Using dirty tools – Can cause rot or infection.
- Overwatering – Snake plants rot easily in soggy conditions.
- No callusing time – Always let cuttings dry for 1–2 days before planting.
- Too little light – They need bright, indirect light to root effectively.
Snake Plant Propagation Problems – How to Solve Them
Even though snake plants are tough, you might run into a few issues while propagating. Here are some snake plant propagation problems and how to fix them:
1. Leaf Rot
If your leaf cuttings start to rot, it’s usually due to too much moisture. Make sure the cuttings are properly dried before planting, and avoid overwatering.
2. No Roots Forming
If you’re not seeing any root growth, it could be because the cutting isn’t getting enough light. Move it to a brighter spot, and be patient – snake plants can take several weeks or months to show signs of rooting.
3. Yellowing Leaves
Yellowing leaves can indicate too much water or not enough light. Adjust your watering schedule or move your plant to a brighter location.
Read my full article on “Where should I place a snake plant in my house” to find out the top spots!


 ChatGPT
 Perplexity
 Claude
Leave a Reply