How to plant kale seedlings without stress comes down to a few calm, well-timed steps: transplant them when they have several true leaves, harden them off for about a week, plant them into moist, well-prepared soil at the same depth they were growing in their pot, space them properly, and water deeply right away.
Kale is tough once it’s established, but the transplant stage is when it’s easiest to set plants back. A seedling that gets stressed early often grows slowly, tastes more bitter, and becomes a magnet for pests like flea beetles. The good news is that kale responds really well to a calm, steady transplant process.
Most transplant problems don’t come from a single mistake, but from several small stresses stacking up during planting.
For complete care beyond transplanting, see how to grow kale.
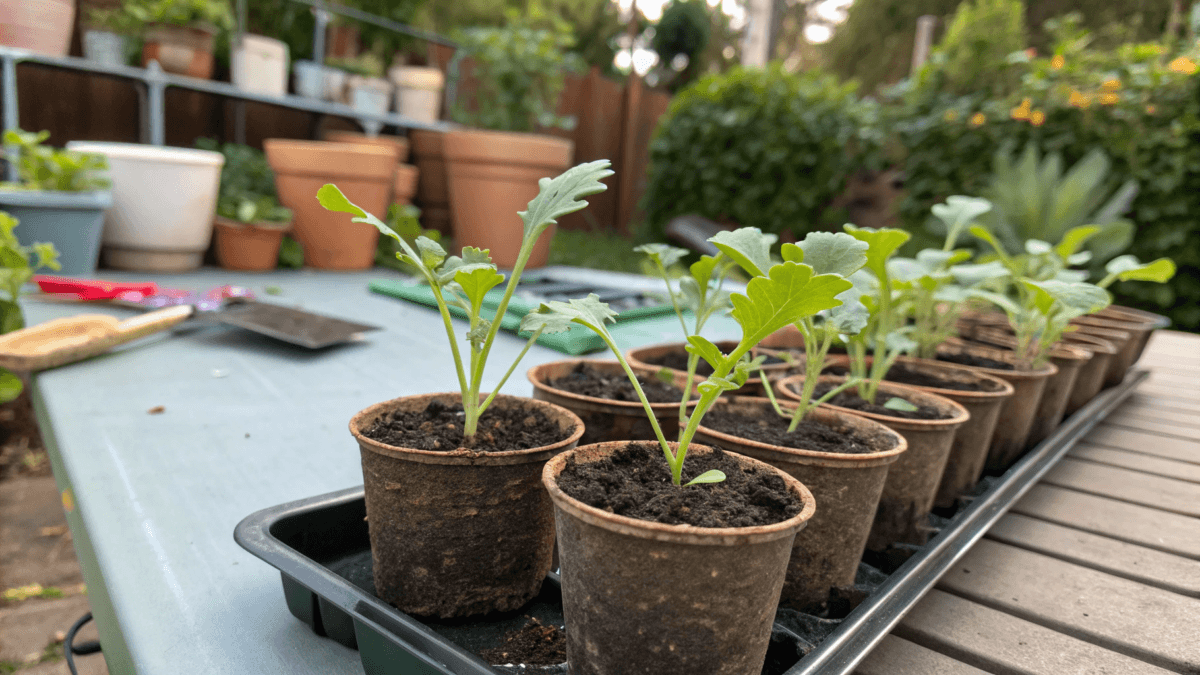
What Kale Seedlings Should Look Like Before Planting
Kale seedlings are ready for transplanting when they have at least 3-4 true leaves, and ideally 4-6 true leaves.
- Seed leaves (cotyledons) are the first two leaves. They’re usually smooth and oval.
- True leaves look like kale, more textured, with little serrations or ruffles, depending on the variety.
A seedling with only seed leaves is too young to handle wind, sun, and variable moisture outside. With 4-6 true leaves, the plant has enough leaf area and root growth to recover quickly.
A practical-sized target:
- 3-5 inches tall is usually sturdy enough
- The stem should be thick enough that it doesn’t flop when you lightly tap the tray
If you’re unsure, waiting a few extra days is usually safer than transplanting too early.
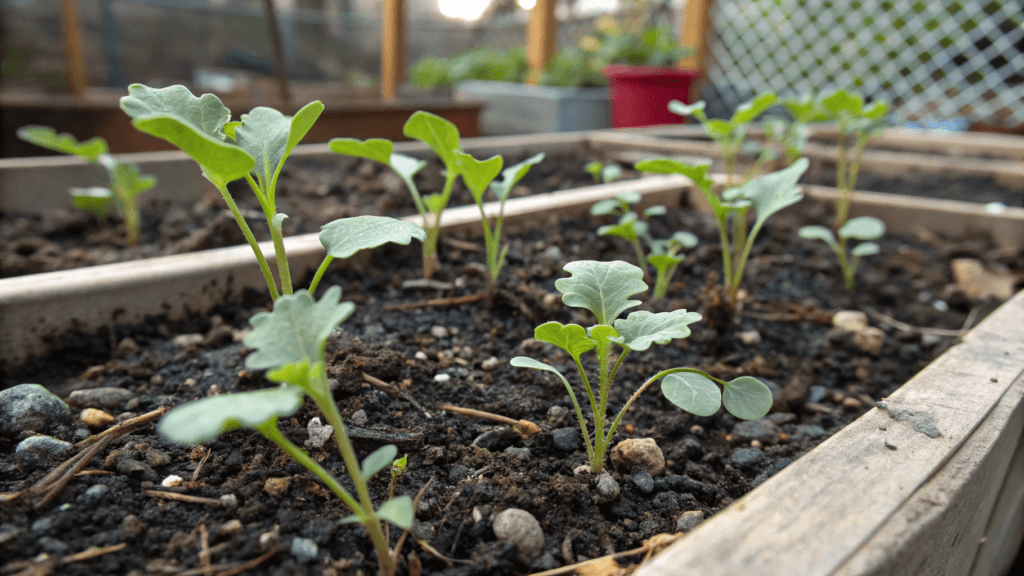
Healthy Vs Weak Seedlings
Healthy kale seedlings have a “stocky” look, compact growth, firm stems, and leaves that are evenly colored.
Healthy seedlings:
- Deep green (or the expected variety color)
- Upright, with a sturdy stem
- Leaves look perky, not limp
- Roots hold the soil together when you slide the plug out
Weak seedlings:
- Leggy (tall, thin, leaning) usually from low light indoors
- Pale leaves, often from lack of light or lack of nitrogen
- Soft, pinched-looking stems
- Roots that are brown, smelly, or mushy (sign of rot)
If seedlings are a little leggy but otherwise healthy, you can still transplant them, but you’ll want to be extra careful with support and protection the first week.
Signs Seedlings Are Ready (Or Not Ready) For Transplanting
Ready:
- 4-6 true leaves
- Stems don’t bend easily
- The root ball stays intact when removed from the cell
- Nighttime temperatures are mostly above 25-30°F (kale can handle light frost, but tiny seedlings struggle in repeated hard freezes)
- Seedlings have been hardened off (more on that below)
Not ready:
- Only cotyledons or 1-2 true leaves
- Roots barely developed
- Seedlings recently stressed (dried out, overheated) and haven’t rebounded yet
- Going straight from indoor lights to full outdoor sun with no transition
If your seedlings wilt hard within minutes of going outside in the shade, they need a gentler hardening-off process before you plant them in the ground.
Preparing The Soil Before Transplanting Kale
Preparing the soil before transplanting kale gives seedlings the conditions they need to root quickly and grow without stress.
Soil Texture And Drainage
Kale seedlings establish best in loose, well-drained soil that holds moisture evenly and contains some organic matter.
- Ideal texture: Crumbly loam
Drainage test: Dig a hole about 12 inches deep, fill it with water, and let it drain. Fill again.
- If the second fill drains within 1-3 hours, drainage is usually fine.
- If it’s still holding water after 4+ hours, that spot may be too wet for seedlings unless you mound the row or improve drainage.
If your soil is heavy clay, kale can still grow well, but seedlings hate sitting in cold, wet soil.
Cold, waterlogged soil slows root growth and increases the chance of staling during the first week after transplanting.
Adding Organic Matter
Kale is a leafy plant, and leafy plants appreciate steady fertility.
Before transplanting, mix in:
- 1-2 inches of finished compost over the bed, worked into the top 6-8 inches
- If you don’t have compost, a balanced organic fertilizer can work. Follow the label, but as a rule, you’re aiming for moderate feeding, not a heavy dose.
Why this works: Compost improves both water-holding (helpful in sandy soil) and structure/drainage (helpful in clay), while providing a gentle nutrient supply that won’t burn tender roots.
Moisture Levels Before Planting
Planting into moist soil is one of the easiest ways to prevent transplant shock. Soil should be moist down several inches, not just damp on top.
- Water the bed a few hours before planting (or the day before, if it’s very dry)
How To Plant Kale Seedlings Step By Step
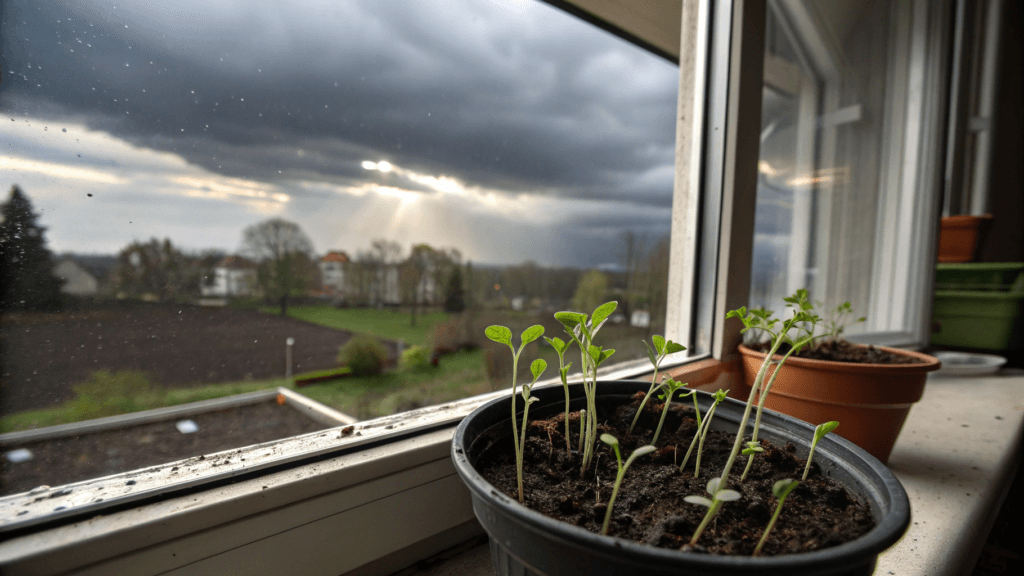
Transplant on a calm day if possible. Overcast weather is perfect. If it’s sunny and hot, plant late afternoon so seedlings get a gentle evening and night to settle.
Avoid transplanting right before a hard rain or a sudden temperature drop whenever possible.
Step 1: Digging The Planting Hole
Make the hole slightly larger than the plug:
- About 2x the width of the root ball
- About the same depth as the plug
Loosen the soil at the bottom of the hole with your trowel so roots can move outward easily, especially in compacted ground.
Step 2: Handling Roots Gently
The goal is to move the seedling with minimal disruption.
- Water the seedlings in their tray 30-60 minutes before planting.
- Hold seedlings by the leaves, not the stem. Leaves can regrow; a crushed stem can’t.
Check the roots:
- If roots are lightly holding the plug, plant as-is.
- If roots are circling tightly, gently tease the bottom with your fingers to encourage outward growth. You don’t need to shred the root ball, just loosen the spiral.
Overhandling roots causes more stress than leaving them slightly bound.
Step 3: Planting Depth And Firming The Soil
Plant kale seedlings at the same depth they were growing in the pot; the soil line on the stem should match the soil line in the garden.
- Don’t bury the stem deeply like you might with tomatoes.
- If a seedling is slightly leggy, you can plant it a little deeper, but keep the lowest true leaves above the soil and avoid burying the stem too much.
After placing the plug:
- Backfill and gently press the soil around the root ball to remove air pockets. You want good root-to-soil contact, but don’t compact the soil tightly.
Step 4: Watering Immediately After Planting
Water right away, even if the soil is moist.
- Give each seedling a slow, deep drink, about 1-2 cups per plant for small transplants, more if the soil is very dry.
- Water at the base, not over the leaves.
This “settling water” pulls soil snugly around roots and prevents tiny air gaps that dry roots out.
If water runs off quickly, slow down the flow and allow it to soak in again so moisture reaches the full root zone.
Quick Planting Checklist
- Water seedlings in trays 30-60 minutes before planting
- Water the bed a few hours before planting if the soil is dry
- Dig a hole 2x as wide as the plug
- Slide the seedling out by pushing from the bottom, handle by the leaves
- Set the seedling at the same soil line as in the pot
- Backfill, firm gently, remove air pockets
- Water deeply at the base immediately
- Add protection (shade/pest cover) if conditions are harsh
Pause and observe seedlings for a few minutes after watering to catch immediate wilting or soil collapse.
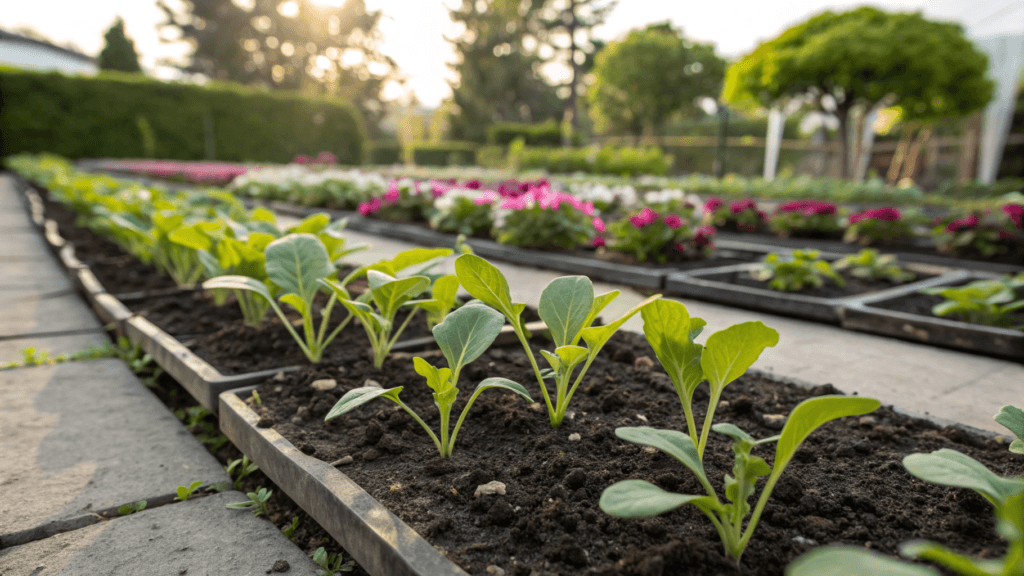
Spacing Kale Plants Correctly
Proper spacing helps kale plants grow strong, healthy, and easy to manage.
Recommended Spacing With Measurements
For most gardens:
- Standard spacing: 12-18 inches between plants
- Row spacing: 18-24 inches between rows
- For baby leaf harvesting: 6-10 inches between plants
- For large plants and big leaves: 18-24 inches between plants
If you’re not sure, go with 15-18 inches. It’s a sweet spot for home gardens.
How Spacing Affects Airflow, Leaf Size, And Plant Health
Spacing is not just about “fit more plants.” It affects:
- Airflow: Better airflow means fewer fungal issues and less leaf spotting.
- Leaf size: More room usually means larger, thicker leaves.
- Pest pressure: Crowded plants are harder to inspect and easier for pests to hide in.
- Moisture competition: Tight spacing dries soil faster and can lead to uneven growth.
Wider spacing also makes harvesting, inspection, and pest control easier later in the season.
Closer Vs Wider Spacing Explained Simply
Choose closer spacing when:
- You harvest frequently and prefer tender leaves
- You have rich soil and consistent watering
- You plan to pull some plants early
Choose wider spacing when:
- You want big, mature plants and large leaves
- Your climate is humid
- You prefer lower maintenance
Preventing Transplant Shock In Kale Seedlings
Preventing transplant shock helps kale seedlings recover quickly and continue growing without delays. By reducing stress before and after planting, you give young plants time to adjust to outdoor conditions and establish strong roots in the soil.
What Transplant Shock Is
Transplant shock is the stress response plants have when they go from a protected environment (stable moisture, gentle light, no wind) to outdoor conditions. It usually shows up as slow growth, drooping, yellowing, or leaf damage.
Kale usually recovers, but shock can delay growth by 1-3 weeks, which is significant if you’re trying to beat the summer heat or establish a fall crop.
During this delay, plants are more vulnerable to pests and uneven watering.
How To Reduce Stress Before Planting
Harden off seedlings for 7-10 days:
- Days 1-2: Outside in bright shade, protected from wind, for a few hours
- Days 3-5: Gradually increase sun exposure (morning sun first)
- Days 6-7+: Longer periods outside, including some wind exposure
Keep seedlings evenly watered during hardening off. A seedling that dries out repeatedly before transplant is much more likely to stall.
Other pre-plant stress reducers:
- Avoid transplanting right after a cold night or right before a heat spike
- Don’t “over-love” seedlings with heavy fertilizer right before planting, lush, soft growth wilts easily
- Avoid strong fertilizer in the planting hole, as it can dry young roots and slow establishment.
How To Protect Seedlings Right After Planting
The first 48 hours matter most.
Helpful protections:
- Temporary shade: A piece of shade cloth, an upside-down crate, or even a light sheet propped up (don’t smother plants)
- Wind protection: Plant near a low barrier or use row cover supports
- Row cover for pests: Lightweight fabric helps against flea beetles and cabbage moths while also reducing wind stress
A simple rule: If you feel like it’s a harsh day (bright sun, gusty wind), it’s a harsh day for a seedling.
What To Do After Planting Kale Seedlings
The care you give kale seedlings right after planting plays a big role in how well they establish.
Watering Guidance
Aim for consistent moisture while roots expand into the surrounding soil.
- First 2-3 days, check daily
- Then, water when the top 1 inch of soil is dry
How much? Enough to wet the soil 6 inches deep. Frequent light sprinkles encourage shallow roots and more stress later.
Signs you’re watering well:
- Leaves stay firm in the morning
- New growth appears in the center within about a week (timing depends on weather)
Mulch helps a lot after seedlings are settled:
- Add 1-2 inches of straw, shredded leaves, or fine bark a few days after transplanting (not piled against the stem)
- Mulch stabilizes moisture and reduces soil splash onto leaves
Sun And Shade Considerations
Kale grows best in full sun, but newly transplanted seedlings can sunburn or wilt.
- In cool spring weather, full sun is usually fine after hardening off
- In warm weather (above ~80°F), afternoon shade can prevent staling and bitterness
If you see leaves bleaching to a pale tan or white, patchy look, that’s usually sunscald. New leaves will often come in fine once you provide temporary shade.
Signs Seedlings Are Settling In Successfully
Within 7-10 days, you want to see:
- Leaves staying upright through the day (minor afternoon droop can be normal in heat)
- The center “crown” is pushing new growth
- Leaf color is staying steady
- Plants resisting a gentle tug (roots starting to anchor)
Minor leaf blemishes from transplanting are normal and don’t usually affect long-term growth.
If seedlings look frozen in time after 10 days, something is off, usually water stress, cold, soggy soil, or pest damage.
Common Mistakes When Planting Kale Seedlings
Many problems with kale start at planting time, not later in the season.
Crowding Plants
Crowded kale often looks fine at first, then suddenly becomes a tangled mass that’s hard to harvest and easy for pests to hide in.
Fix:
- Space at least 12-18 inches unless you’re growing baby leaf
- If you already planted too close, thin the weakest plants early rather than waiting
Planting Into Dry Soil
Dry soil pulls moisture from the root ball, and seedlings can wilt even if you water after.
Fix:
- Pre-water the bed
- Water immediately after planting
- Consider shading for 2-3 days if conditions are hot or windy
Rough Root Handling
Pulling seedlings by the stem, tearing plugs apart, or leaving roots exposed to sun and wind slows establishment.
Fix:
- Handle by leaves
- Keep trays in the shade while planting
- Work in small batches, so roots aren’t sitting out
Skipping Early Watering Or Protection
Even hardened-off seedlings can struggle in sudden heat, gusty wind, or pest pressure.
The first 3-5 days matter far more than perfect care later.
Fix:
- Use temporary shade when needed
- Use lightweight row cover if flea beetles or cabbage moths are common in your area
- Check plants daily the first week, quick fixes matter most then
Conclusion
Planting kale seedlings outdoors works best when you keep things simple. Use healthy seedlings, plant them into moist, well-prepared soil, and give each plant enough space.
Water well after planting and pay close attention during the first few days. When seedlings get a steady, low-stress start, they root in faster and grow more reliably through the season.
When transplanting is done carefully, kale often outgrows direct-sown plants and becomes one of the easiest crops to maintain.

Leave a Reply