
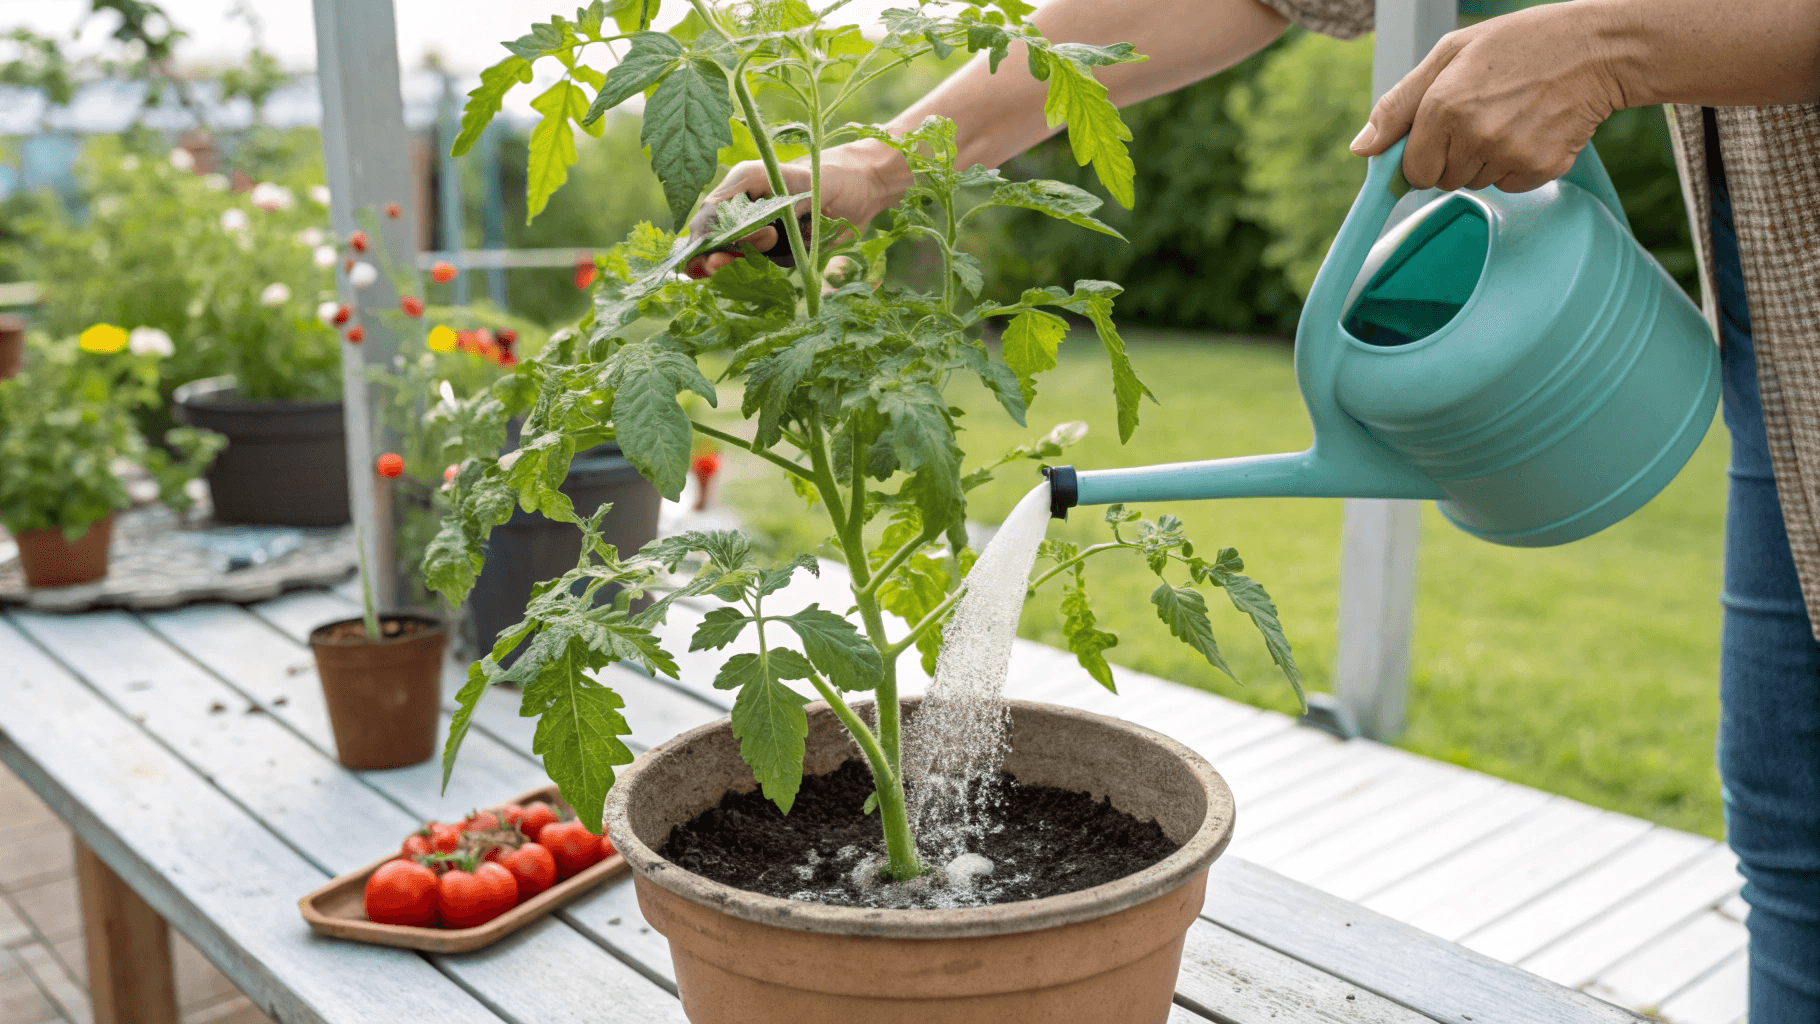
Gardening isn’t just about planting seeds, it’s about nurturing life. While a seed starting mix gives your seedlings a strong launch, they quickly need more nutrients. That’s where liquid fertilizer shines. It’s fast-absorbing, eco-friendly, and costs pennies.
Best of all, you can make liquid fertilizer at home using kitchen scraps and weeds! I’ve used these for years in my garden, and they’re game-changers.
Why I Skip Store-Bought?
Homemade fertilizer reduces waste, saves money, and avoids synthetic chemicals. Plus, I control what goes into my plants.
Whether you’re nurturing a seed starting mix or feeding mature crops, how to make liquid fertilizer at home is a skill every gardener should master.
The Science of DIY Liquid Fertilizers
Liquid fertilizers work through rapid nutrient mineralization. Water-soluble elements (K, Ca, Mg) leach into solution, while fermentation breaks down complex compounds into plant-available forms.
Essential Components:
- NPK Ratios:
- N (Nitrogen) for leafy growth
- P (Phosphorus) for roots/blooms
- K (Potassium) for disease resistance
- Secondary Nutrients: Calcium, Magnesium, Sulfur
- Microbes: Lactobacillus from fermentation aids nutrient uptake
How to Make Liquid Fertilizer
All homemade liquid organic fertilizer follows a simple process:
- Soak ingredients in water.
- Ferment for 1–4 weeks (stirring weekly).
- Strain and dilute before use.
Recommended: Use rainwater or dechlorinated tap water—chlorine kills beneficial microbes!
Now, let’s dive into my favorite recipes + 3 bonus recipes.
9 Easy Homemade Liquid Fertilizers (+ Recipes)
1. Banana Peel Fertilizer

Why it works: Packed with potassium (K), phosphorus (P), and calcium—ideal for fruiting and flowering.
Recipe:
It may ferment slightly – that’s not a problem, it just smells.
- Chop 3–4 banana peels + 1 tbsp eggshells (optional).
- Soak in 1 quart of water for 2–3 days. Strain.
- Add 1 tsp blackstrap molasses to feed microbes. (optional)
Dilution: 1:3 with water (e.g., 1 cup fertilizer + 3 cups water).
If you don’t dilute it:
- Excess potassium may accumulate, which can hinder the absorption of other nutrients (especially calcium and magnesium).
- In potted plants, this can lead to yellowing of the leaves or growth deformities with prolonged use.
Watering: Only around the roots, not on the leaves.
Frequency: Оnce every 10–14 days.
Best for: Flowering/fruiting plants like tomatoes, peppers, roses.
Tip: After straining the banana water, you can lightly bury the remaining peels in the soil (away from the stem) – they will decompose and provide slow-release nutrients.
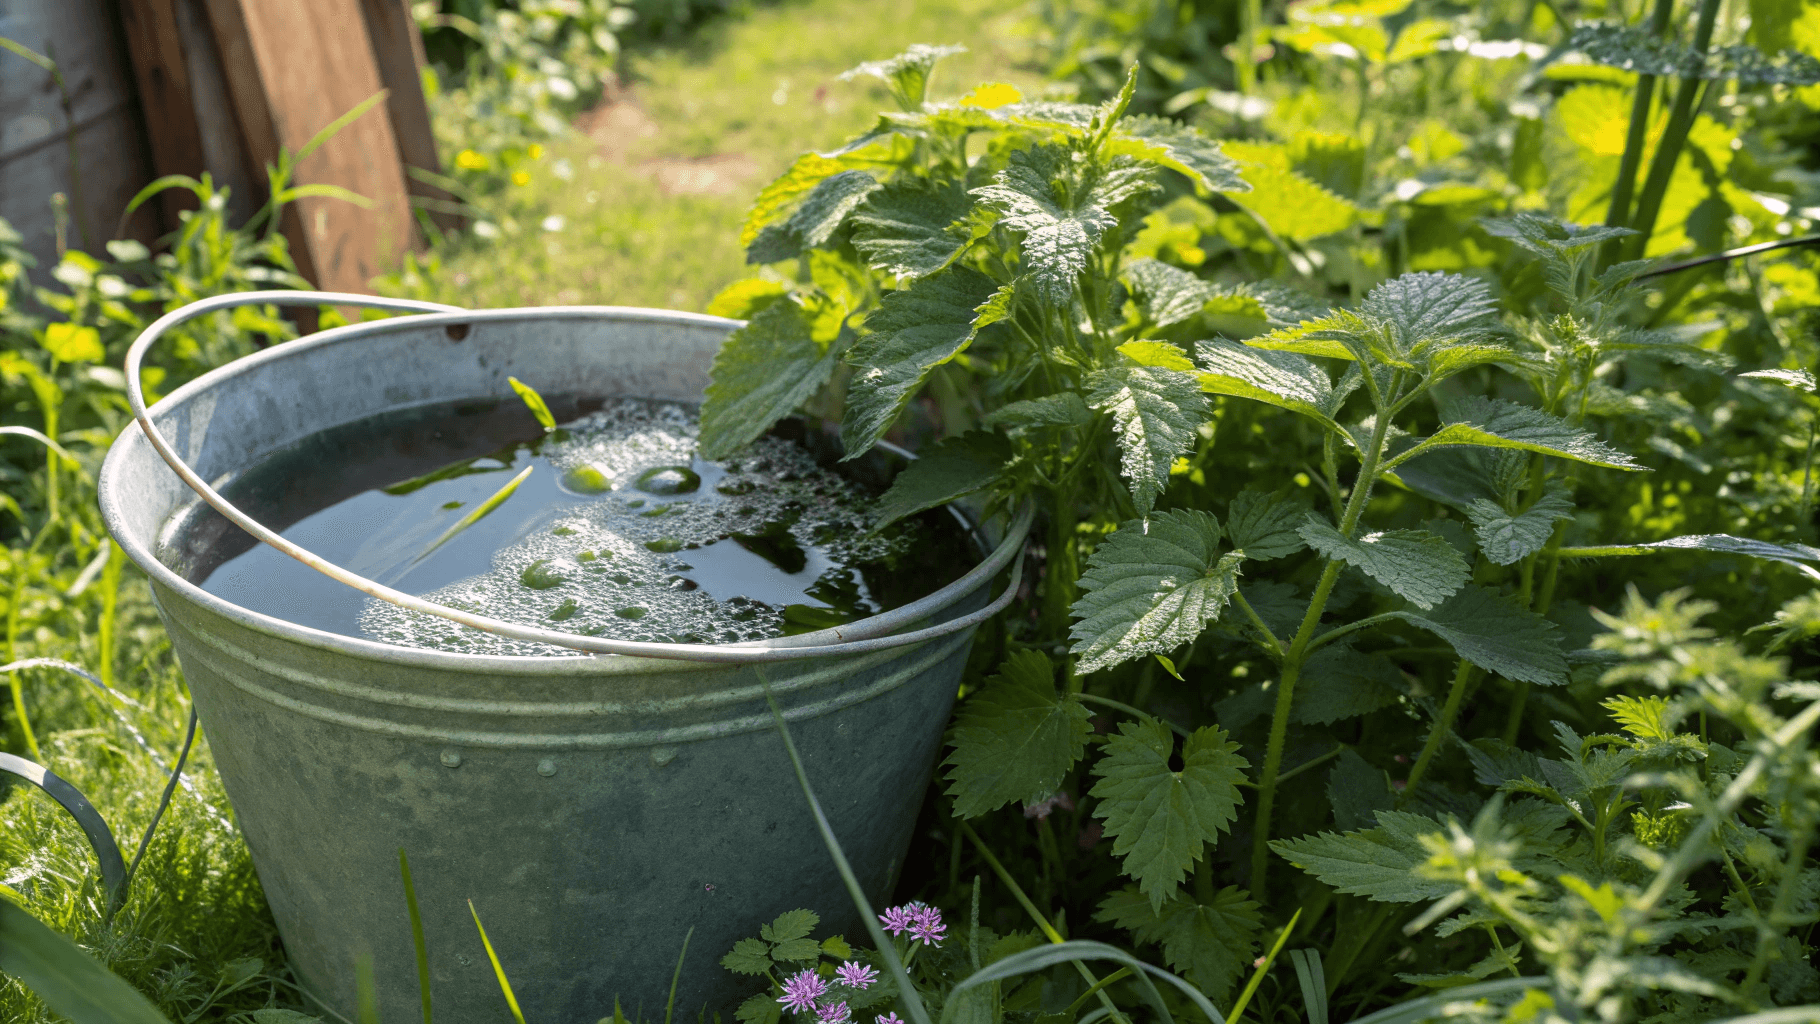
2. Nettle Fertilizer

Why it works: Rich in nitrogen (N), iron, potassium (K), microelements, and magnesium. Great for young plants – stimulates leaf growth and strong stem development. The stinging nettle fertilizer is one of my favourites as well!
Recipe:
- Fill a bucket ¾ full with fresh nettles (wear gloves!).
- Cover with rainwater. Weight down with a stone.
- Ferment 7-10 days (stir every 3 days; it will smell strong).
- Strain when foamy.
Dilution: 1:10 (foliar) or 1:20 (soil) with water.
Bonus: Spray undiluted to deter aphids!
Watering: Only around the roots, not on the leaves.
Frequency: Оnce every 10–14 days.
Best for: Leafy greens (lettuce, kale), brassicas, seedlings.
Don’t boil – it’s fermented! Fermentation extracts the nutrients best; boiling destroys them.
3. Potato Water Fertilizer

Why it works: Rich in potassium, phosphorus, and micronutrients. Starchy water also leaches potassium and vitamin B6.
Recipe:
- Option 1: Save water from boiling potatoes (without salt). Cool completely. Use immediately!
- Option 2: Collect potato peels and soak them in 1 liter of water for 24-48 hours. Use it immediately after soaking.
- Boiling – this is safer, as it breaks down the starch and prevents rotting. It is good if you plan to store it for a few days.
- Without boiling – it’s riskier since it may sour or grow mold.
Dilution: None needed. Use straight.
Watering: Only around the roots.
Frequency: Оnce every 10 days.
Best for: Root vegetables (carrots, beets), herbs.
4. Rice Water Fertilizer

Why it works: Fermented rice water contains NPK, lactic acid, and beneficial bacteria. Lactobacillus prevents damping-off disease!
Recipe:
Option 1: Fresh (raw)
- Rinse 1 cup of rice in 2 cups of water until cloudy.
- Shake for 30 seconds to 1 minute.
- Strain and use directly for watering.
Dilution: Use undiluted.
Option 2: Fermented (stronger)
- Rinse 1 cup of rice in 2 cups of water, sit for 1–2 days at room temperature.
- When it starts to smell slightly (fermentation), it’s ready.
- Strain.
Dilution: 1:3 with water.
My recommendation:
• Always use unsalted and unsweetened water.
• Do not use water in which rice was cooked with spices, oil, or salt.
• Do not use if there is mold or a rotten smell – discard it.
Watering: Only around the roots, also you can spray leaves for pests.
Frequency: Оnce every week for watering and once every 10-14 days for spraying.
Best for: Seedlings, flowering/fruiting plants like tomatoes, peppers, cucumbers, herbs, orchids, houseplants.
5. Fish Emulsion (Fish Water)

Why it works: High in nitrogen (N) and trace minerals. Smelly but powerful!
Recipe:
- Blend fish scraps (heads, guts) with equal parts water and 1/4 cup vinegar (optional)
- Ferment 4–6 weeks in a sealed jar (burp weekly!).
- Strain.
Vinegar preserves proteins (better than rancid emulsions).
Dilution: 1:1 with water.
My recommendation:
• Don’t use for orchids or plants that prefer poor, clean soil.
• Do not use if the water contains algae treatments, antibiotics, or other chemicals.
• After watering with fish tank water, avoid additional fertilizing for at least 1–2 weeks.
Frequency: Оnce every 2 weeks.
Best for: Heavy feeders like corn, squash, and cucumbers, herbs, flowering indoor plants, and evergreen houseplants.
6. Eggshell & Vinegar Calcium Tonic

Why it works: Eggshells add calcium; vinegar makes it soluble. Vinegar (acetic acid) breaks down calcium carbonate and converts it into calcium acetate, which plants can absorb immediately.
Recipe:
- Put the crushed eggshells into a jar (fill about 1/3 of it).
- Pour in vinegar until the shells are fully covered.
- Foam will start to form – this is normal (a reaction between calcium carbonate and vinegar).
- Leave the jar open (or covered with gauze) for 3–5 days, stirring gently once a day.
- When the shells stop “fizzing” and are almost fully dissolved, the liquid is ready.
- Strain and store in a sealed bottle in a cool place.
Dilution: 1 tablespoon per gallon of water.
My recommendation:
• Do not use frequently – excess calcium can disrupt soil pH.
• Do not water acid-loving plants (azaleas, orchids, rhododendrons).
• Always dilute – this concentrated mixture is strong!
Frequency: Оnce per month if needed.
Best for: Preventing blossom-end rot in tomatoes/peppers, cucumbers. Flowering plants – strengthen stems and buds.
7. Seaweed

Why it works: Rich in microelements (iron, zinc, copper). Contain growth hormones. Increase plant resistance to stress, diseases, and drought. Stimulate root formation.
Recipe:
- Rinse 2 cups of fresh seaweed (remove sand).
- Soak in 1 gallon of water for 3-4 days.
- Strain.
Dilution: 1:3 with water
My recommendation:
• Don’t overuse – small amounts are enough, as this is a stimulant, not a primary fertilizer.
• If collecting seaweed from the beach – rinse thoroughly to remove salt!
• Don’t combine directly with strong nitrogen fertilizers – it may block their effect.
Frequency: Оnce per 2 weeks.
Best for: All plants (especially stressed transplants)
Contains cytokinins – reduces transplant shock in seed starting mix!
8. Wood ash

Why it works: Rich in potassium, calcium, magnesium, phosphorus, and no nitrogen.
Recipe:
Option 1: Dry ash (in the garden):
- 1–2 handfuls per m² or 1 teaspoon per pot.
- Sprinkled around the plants and lightly mixed into the soil.
Do not mix with nitrogen fertilizers (urea, manure-based fertilizers) – they neutralize each other.
Option 2: Liquid (ash tea):
- Mix 1 cup of ash in 5 liters of water.
- Stir and let sit for 24 hours.
My recommendation:
• Do not use ash from painted or varnished materials.
Watering: Only around the roots with 1 liter per plant.
Frequency: 1–2 times a month.
Best for: Sunflowers, geranium, tomatoes, peppers, beans, onions, garlic.
9. Compost tea

Why it works: High in balanced macro- and micronutrients. Acts as a probiotic for the soil. Stimulates growth and helps protect against diseases.
Recipe:
- Add 1 cup of compost or manure to 3 liters of water.
- Stir and cover with cheesecloth.
- Let it sit for 24–48 hours (no longer).
- Strain.
Dilution: 1:3 with water
My recommendation:
• Use within 2 days after straining – otherwise, it loses its effectiveness.
• Do not combine with mineral fertilizers on the same day.
• Do not use if it has a bad, rotten smell – this means the tea has fermented improperly.
Frequency: Once every 10–14 days.
Best for: General feeding, mature plants. Especially beneficial for rooting, seedlings, and depleted soils.
Don’t boil – heat kills the beneficial microorganisms.
Bonus: Check out my review “Top 5 Home Compost Machines” if you are searching for a proper composter at home.
How to Use Liquid Fertilizer
- Containers: Water every 2 weeks.
- Garden Beds: Apply monthly.
- Always water soil—not leaves (except nettle spray for pests).
When to Fertilize Seedlings
You can start fertilizing your plants when they show these signs:
Seedlings:
Apply 2 weeks after sprouting (dilute to half strength).
Strong roots & mature leaves:
- Roots are well-developed
- At least 4–6 true leaves (not just the first baby leaves!)
Settled into their “home”:
- 1 week after transplanting into individual pots
- OR given ample space in a larger container
Recovered from stress:
- Waited 5–7 days after transplanting or pruning
- Actively growing (no wilted or yellowing leaves)
What Fertilizer to Use (Stage-by-Stage Guide)
It’s important not to overload the same nutrients (especially nitrogen).
If you fertilize with multiple high-nitrogen sources at once, you can easily:
- Over-fertilize the plant (causing it to “burn” or produce excessive foliage at the expense of flowering)
- Damage the roots due to salt buildup
So fertilize as needed by the plant:
1. Early Growth Stage (Leaf & Stem Development):

Use HIGH-NITROGEN fertilizer
Examples:
- Nettle tea
- Diluted fish emulsion
Why? Nitrogen fuels lush, green growth!
2. Flowering & Fruiting Stage (4-6 weeks later):

Switch to BALANCED or HIGH-POTASSIUM/PHOSPHORUS fertilizer
Examples:
- Banana peel tea (potassium booster)
- Comfrey tea (phosphorus powerhouse)
When it’s OK to Switch Fertilizers
- When the plant’s growth stage changes – e.g., from vegetative growth to flowering, fruiting.
- If you’re alternating between types (organic/mineral), as long as you don’t mix them at the same time.
- If you’re observing the plant’s response, such as yellowing leaves (up nitrogen), weak growth, or lack of flowering (boost phosphorus & potassium).
6 Key Tips for Success
- Water first. Moisten the soil before fertilizing to prevent root shock, OR BURN THEM.
- Don’t pour over the leaves – some liquid fertilizers can leave residue.
- Always dilute. Homemade fertilizers should look like weak tea.
- Stop if stressed. Skip feeding if plants look wilted, heat-stressed, or diseased.
- Test pH. Most homemade fertilizers are slightly acidic (pH 6–7). Adjust with wood ash if needed.
- Store strained fertilizer in sealed jars in a cool, dark place for 3–6 months. Add 1 tbsp of molasses monthly to feed microbes.
Troubleshooting
- Yellow leaves? – Too much water or nitrogen imbalance.
- Flowers dropping? – Boost potassium (try banana tea ASAP!).
- Crispy leaf edges? – Over-fertilizing – Flush the soil with water.
Final Thoughts
Learning how to make a liquid fertilizer transforms your garden into a self-sustaining ecosystem. Start with banana peels or rice water—you’ll see thicker stems and brighter blooms in weeks.
Remember: gardening is about experimenting. Try these recipes, note what works, and share your results!

Leave a Reply