Swiss chard is one of the easiest leafy greens to grow from seed, and learning how to grow swiss chard from seed properly makes the difference between weak seedlings and long, productive harvests. If you plant at the right depth, keep the soil evenly moist during germination, and thin seedlings properly, you can expect strong plants that produce for months.
The key to success is understanding that Swiss chard seeds are actually clusters. That affects spacing, thinning, and how you judge germination. Once you work with that instead of against it, growing chard from seed becomes simple and reliable.
If you want the short version before we go deeper:
- Plant seeds ½-1 inch deep in soil at least 50°F (10°C)
- Keep the soil evenly moist until seedlings emerge (7-14 days)
- Expect multiple seedlings per seed cluster
- Thin to 6-12 inches apart once true leaves form
- Avoid disturbing roots once plants are established
With those basics handled, Swiss chard becomes one of the most dependable crops in the garden.
Swiss Chard Germination Quick Facts:
- Soil temperature: 50-70°F (10-21°C) ideal
- Germination time: 7-14 days
- Seed depth: ½-1 inch
- Light needed to germinate: No
- Soaking helpful: Optional (8-12 hours)
- Common failure cause: Dry soil during sprouting
For the complete growing cycle, including soil preparation, watering, feeding, harvesting, and long-term care, see How to Grow Swiss Chard.
Why Growing Swiss Chard From Seed Works So Well
Swiss chard is naturally suited to direct sowing. It germinates reliably in cool soil, tolerates moderate temperature swings, and establishes a deep taproot early. That taproot is one reason seed-grown plants tend to perform better long term.
When you start from seed:
- Roots develop undisturbed from day one
- Plants adapt to your soil conditions immediately
- You avoid transplant shock
- You can succession sow easily
Seed-grown chard often regrows more vigorously after harvest because its root system was never confined in a small cell pack. Over a long season, that makes a difference in leaf size and recovery speed.
Seed starting also supports succession planting. You can sow small batches every 2-3 weeks in spring and again in late summer for fall harvests. Buying transplants repeatedly is rarely practical, but seed makes it easy.
Buying starts can make sense if:
- Your season is extremely short
- You’re planting very late
- You lost an early sowing and need to catch up
In most home gardens, though, direct sowing is simpler and more productive.
Understanding Swiss Chard Seeds (Why They’re Different)
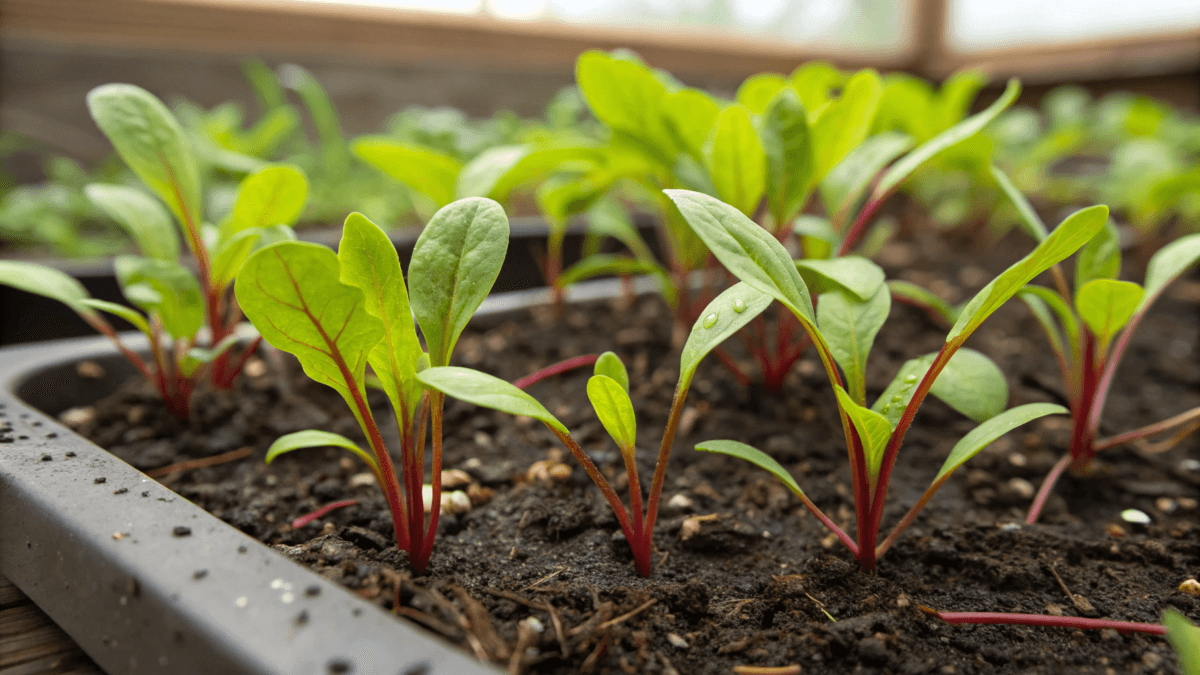
What we call a “Swiss chard seed” is actually a dried fruit cluster containing multiple embryos. That’s why two or three seedlings often sprout from one planted seed.
This matters because:
- Germination can look uneven at first
- Seedlings often emerge in tight clumps
- Thinning is not optional
If you skip thinning, those seedlings compete immediately. Crowded plants produce smaller leaves, thinner stems, and slower regrowth later in the season.
Should You Soak Swiss Chard Seeds Before Planting?
Should You Soak Swiss Chard Seeds Before Planting?
Soaking Swiss chard seeds for 8-12 hours before planting can slightly speed up germination, especially in cool spring soil. It is not required, but it can help when soil temperatures are on the lower end of the ideal range.
Do not soak longer than 12 hours. Extended soaking can reduce oxygen availability and weaken seed performance. In warm, evenly moist soil, soaking offers little benefit.
Best Time to Start Swiss Chard From Seed
Swiss chard germinates best when soil temperatures are between 50-70°F (10-21°C). It will sprout more slowly at the lower end and faster in warm soil.
Typical germination timing:
- 50-55°F: 12-14 days
- 60-70°F: 7-10 days
- 75-85°F: 5-7 days
Spring and fall are ideal. In most climates:
- Early spring: 2-3 weeks before last frost
- Late summer: 6-8 weeks before first frost
Chard tolerates light frost once established, which makes fall seed starting especially reliable.
Indoor starting makes sense if:
- Soil is still too cold outdoors
- Heavy spring rains keep beds saturated
- You want very early harvests
In hot summer climates, avoid sowing in soil above 90°F. Germination drops, and seedlings struggle in extreme heat.
Growing Swiss Chard From Seed in Different Climates
Cold Climates
Direct sow as soon as the soil is workable in early spring. Use row covers to warm the soil slightly and protect young seedlings from frost. Fall sowing is often even more reliable than spring planting.
Mild Climates
Swiss chard can be sown in early spring and again in late summer. In areas with mild winters, fall planting often produces the longest harvest window.
Hot Climates
Avoid sowing during extreme summer heat. Soil temperatures above 90°F reduce germination rates. Provide light afternoon shade during early establishment and keep the soil consistently moist.
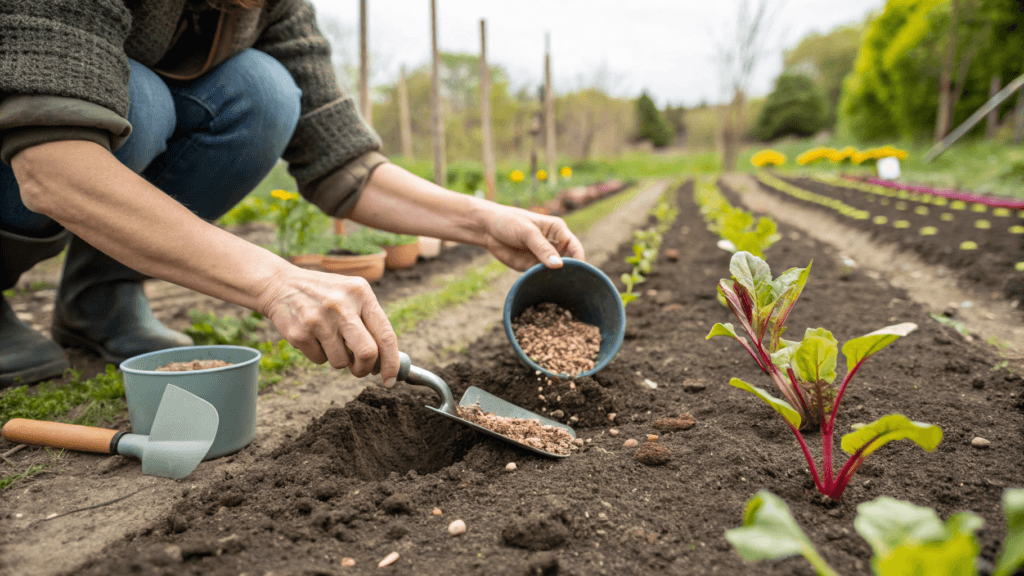
Direct Sowing Swiss Chard Seeds Outdoors
Direct sowing is the simplest method and usually the most successful.
- Choose a well-drained spot that receives at least 6 hours of sunlight. Rake soil smooth and remove large clumps so seeds make good contact with the soil.
- Optional: Soaking seeds in water for 8-12 hours before planting can speed up germination slightly, especially in cool soil.
- Plant seeds:
- ½-1 inch deep
- 2-3 inches apart at sowing
- Rows spaced 12-18 inches apart
You’ll thin later, so initial spacing does not need to be final spacing.
What Happens If You Plant Swiss Chard Seeds Too Deep?
Planting deeper than 1 inch can delay emergence or prevent seedlings from reaching the surface, especially in heavier soil. Seeds planted too shallowly may dry out before germinating.
If emergence looks uneven, depth inconsistency is often the cause. Staying within the ½-1 inch range gives the most reliable results.
- After planting:
- Water gently but thoroughly
- Keep the top inch of soil consistently moist
- Avoid crusting on heavy clay soils
If the soil dries out during germination, sprouting becomes uneven. Consistent moisture during this stage prevents patchy growth.
Once seedlings emerge, reduce watering frequency slightly but keep soil evenly moist until roots establish.
Starting Swiss Chard Seeds Indoors
Indoor starting is useful in colder climates or when outdoor conditions are unpredictable.
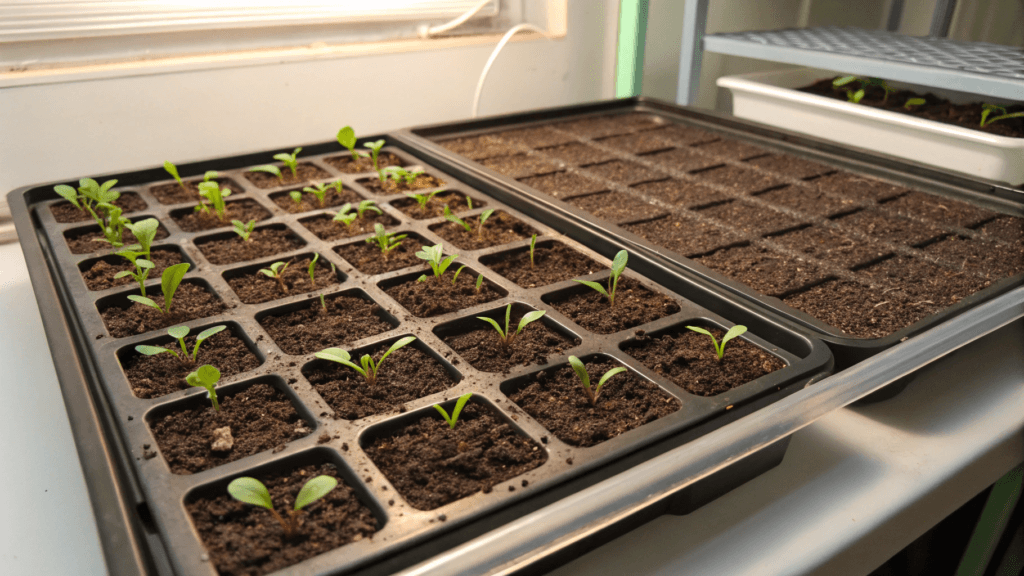
- Use trays or small pots at least 2-3 inches deep. Swiss chard forms a strong root early, so shallow trays are not ideal.
- Fill containers with a light, well-draining seed-starting mix. Avoid heavy garden soil indoors; it compacts and drains poorly in containers.
- Plant seeds:
- 0.5-1 inch deep
- 1-2 seeds per cell
Because each seed may produce multiple sprouts, you may still need to thin within cells.
- Provide:
- Bright light immediately after emergence
- 14-16 hours of light daily under grow lights
- Airflow to reduce disease risk
- Temperatures around 60-70°F
Keep soil moist but never saturated. Overwatering is the most common indoor mistake.
Legginess usually results from insufficient light, not warmth.
Germination Expectations
Swiss chard does not always sprout evenly. One sprout may appear first, with additional seedlings from the same cluster emerging a few days later.
Wait at least 14 days before assuming germination failed.
Re-sow only if:
- The soil dried completely during germination
- No seedlings appear after 14-18 days in proper temperatures
Uneven emergence is normal and usually corrects itself after thinning.
How to Thin Swiss Chard Seedlings Properly
Thinning is essential. Without it, plants compete from the start.
Wait until seedlings develop their first true leaves. At that stage, roots are established enough to survive thinning.
Final spacing:
- 6 inches apart for baby leaf production
- 10-12 inches apart for full-size plants
Always cut extra seedlings at the soil level with scissors. Pulling them can disturb neighboring roots.
Use thinnings as microgreens. They’re tender and flavorful at this stage.
Thinning early prevents:
- Weak stems
- Narrow leaves
- Poor airflow
- Slower regrowth later
It may feel harsh to remove healthy seedlings, but it directly improves harvest size and longevity.
Transplanting Seed-Started Swiss Chard
Seedlings are ready to transplant when:
- They have 2-3 true leaves
- Roots fill the cell but are not root-bound
- Outdoor temperatures are stable
Harden off plants for 5-7 days before transplanting. Gradually increase outdoor exposure each day.
Plant them at the same depth they grew in containers. Do not bury stems deeper.
After transplanting:
- Water thoroughly
- Provide light shade for 1-2 days if the weather is hot
- Avoid fertilizing immediately
Transplant shock is minimized when seedlings are moved early and kept evenly moist during the first week.
Early Seedling Care After Sprouting
Once seedlings emerge, your focus shifts to steady, balanced growth.
Water when the top inch of soil feels dry. Avoid frequent shallow watering. Deep, consistent moisture encourages stronger roots.
Outdoors:
- Ensure full sun to partial shade
- Watch for flea beetle damage on young leaves
- Use lightweight row covers if pest pressure is high
Indoors:
- Keep lights close (2-3 inches above seedlings)
- Rotate trays for even growth
- Maintain airflow
Strong early growth sets the foundation for months of harvest.
Common Problems When Growing Swiss Chard From Seed
Swiss chard is generally reliable from seed, but early-stage problems can still happen. Most issues show up during germination or in the first few weeks of growth, when seedlings are most vulnerable.
Poor Germination
Often caused by:
- Dry soil during sprouting
- Soil temperatures below 45°F
- Seeds planted too deeply
Damping-Off
Seedlings collapse at the soil level. Usually due to:
- Excess moisture
- Poor airflow
- Contaminated soil
Leggy Seedlings
Thin, stretched stems from:
- Insufficient light
- Lights placed too high
- Overcrowding
Slow Early Growth
Typically caused by:
- Cold soil
- Overcrowding
- Compacted soil
Seedling Loss After Transplant
Usually linked to:
- Skipping hardening off
- Rough handling during transplanting
- Letting the soil dry out immediately after planting
Identifying the cause early prevents repeating the same issue.
How to Fix Seed-Starting Problems Mid-Grow
If gaps appear, re-sow directly into open spots while the soil is still suitable for germination.
If seedlings are weak:
- Increase light intensity
- Improve airflow
- Thin immediately
If soil conditions were poor:
- Lightly loosen surface soil around plants
- Improve drainage if water is pooling
Restart only if:
- Seedlings are severely diseased
- Over 50% failed
- Growing conditions have improved significantly
Most minor problems can be corrected without starting over.
How Seed Starting Affects Long-Term Swiss Chard Growth
Plants grown directly from seed develop a strong, uninterrupted root system. That leads to:
- Faster regrowth after cutting leaves
- Better drought tolerance
- Longer harvest windows
- Stronger stems
Transplanted seedlings can perform well, but early confinement slightly reduces long-term vigor.
When harvested correctly (outer leaves first), well-established seed-grown plants often produce continuously for 3-5 months.
Direct Seed vs Transplant: Which Is Better?
Direct seeding is best when:
- Soil is workable
- The weather is stable
- You want maximum root strength
Transplanting is helpful when:
- The spring soil stays too wet
- You’re starting very early
- Space needs precise planning
By climate:
- Cool climates: An indoor start can extend the season
- Mild climates: Direct sow almost always works
By garden type:
- Raised beds: Direct sow ideal
- Containers: Either method works
- Heavy clay: An indoor start may reduce early losses
For most gardeners, direct sowing remains the simplest way to grow strong, long-lasting plants.
Seed-Starting Mistakes to Avoid
Avoid these common errors:
- Planting deeper than ½-1 inch. Planting too shallow can also cause drying before germination.
- Letting the soil dry during germination
- Skipping thinning
- Growing seedlings in weak light
- Overcrowding containers
Each of these reduces long-term plant performance more than people realize.
Quick Seed-Starting Checklist for Swiss Chard
Before and during germination, confirm:
- Soil temperature above 50°F
- Seeds planted ½-1 inch deep
- Soil consistently moist
- Plan for thinning at the true leaf stage
- Protection from early pests if needed
A simple checklist prevents most beginner issues.
How Long Until You Can Harvest Swiss Chard?
Baby leaves are ready in about 25-35 days after planting. Full-size leaves typically develop in 50-60 days, depending on temperature and spacing.
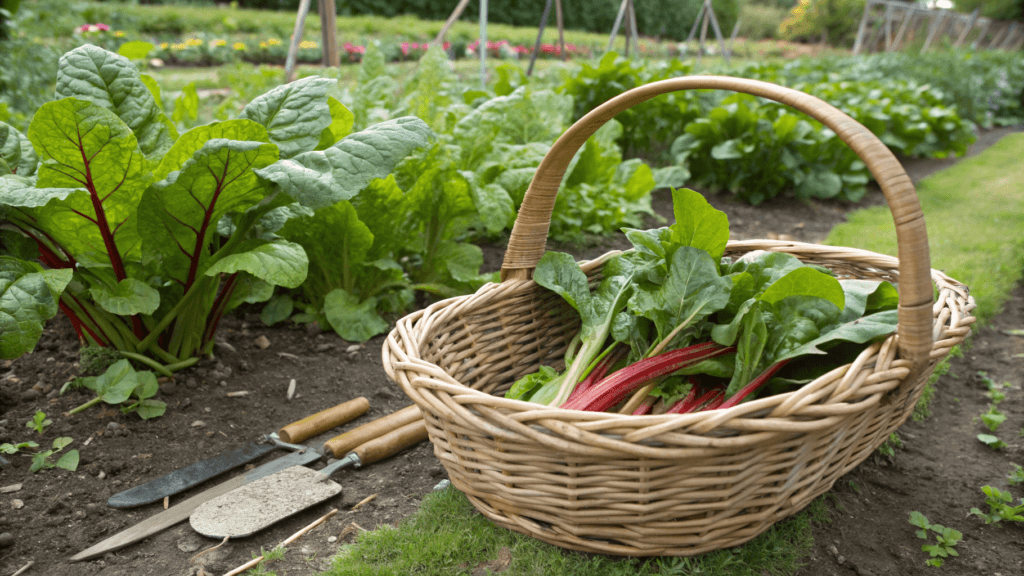
Begin harvesting outer leaves once they reach usable size. Do not remove more than one-third of the plant at a time. Early, moderate harvesting encourages continuous regrowth.
Conclusion
Growing Swiss chard from seed is simple once you understand how seed clusters behave and plan for thinning from the start. Plant at the correct depth, maintain steady moisture during germination, and give each plant the space it needs early on.
When established properly, seed-grown chard develops a deep, resilient root system that supports steady regrowth for months. Few leafy greens combine reliability, productivity, and long harvest windows as consistently as Swiss chard started well from seed.
Leave a Reply