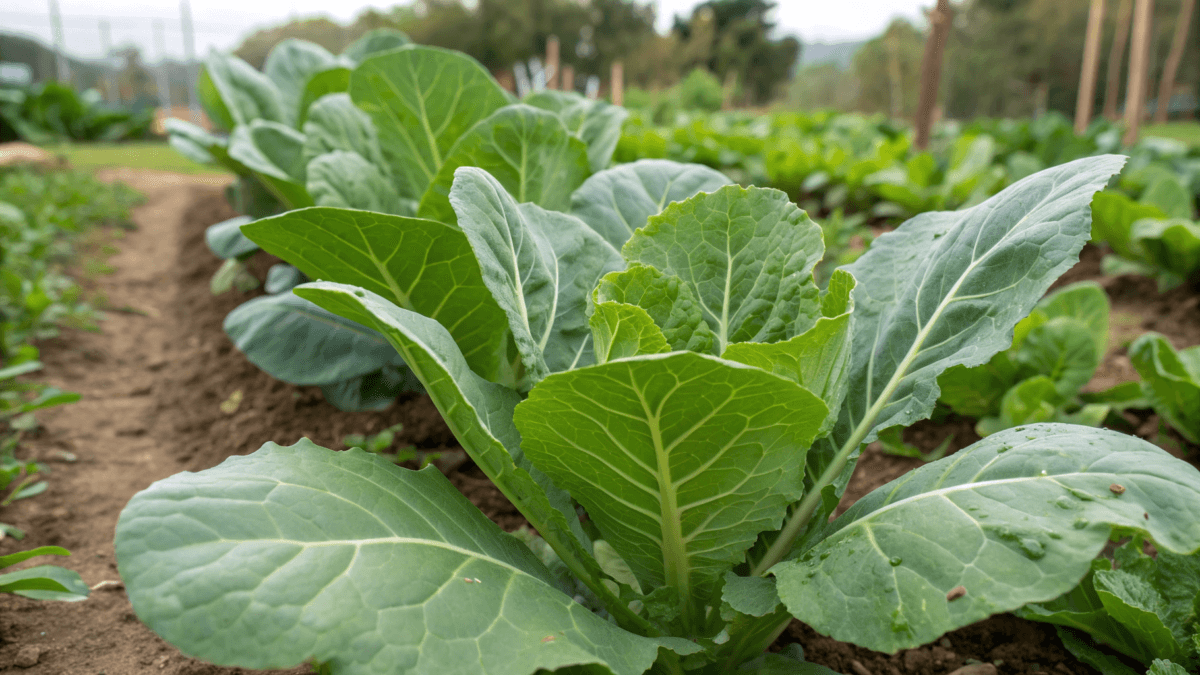
Collard greens are easy to grow, highly cold-tolerant, and one of the most reliable leafy vegetables for home gardens.
As temperatures cool, collard greens actually improve in flavour. Light frost makes collard leaves noticeably sweeter, which is why many gardeners wait until after the first frost to harvest.
This guide about how to grow collard greens is based on practical growing experience across spring, fall, and winter conditions.
If you’re new to growing vegetables, my Vegetable Gardening for Beginners guide covers the basics that make crops like collard greens easier to grow successfully.
Health Benefits of Collard Greens
Collards are famous for being nutrient-dense. They’re a smart choice if you want food that feels “worth it” with every bite.
Common reasons people add collards to their meals:
- Rich in Vitamins: Especially vitamin K, vitamin A, and vitamin C
- Full of Fiber: Supports digestion and helps you feel full
- Loaded with Antioxidants: Helpful for overall health
- Minerals: Calcium and magnesium are often present in meaningful amounts
They’re also versatile, great sautéed, braised, added to soups, blended into smoothies (yes), or chopped into stir-fries.
Collard Greens Plant Profile
| Feature | Collard Greens |
|---|---|
| Plant Type | Leafy vegetable (biennial, grown as an annual) |
| Planting Time | Spring and fall |
| Sun Requirements | Full sun; tolerates partial shade |
| Soil Requirements | Loose, well-drained, rich in organic matter |
| Watering | Moderate, consistent moisture |
| Climate Tolerance | High frost tolerance, moderate heat tolerance |
| Time to Harvest | 60–85 days |
| Common Pests/Diseases | Cabbage worms, aphids, slugs, and clubroot |
| Companion Plants | Onions, garlic, chives, peas |
Best Types of Collard Greens
The “best” collard variety depends on what you want: fast growth, compact size, big leaves, or extra cold tolerance.
Here are reliable types gardeners often choose:
1. Vates
Compact, cold-hardy and slow-bolting, making it ideal for containers and small gardens. It’s a favorite for winter growing because it tolerates low temperatures well.

2. Georgia / Southern Georgia
A classic variety with large, smooth blue-green leaves. It’s fast-growing and very tender when harvested young. Great for beginners. It handles heat better than many collards, making it a solid choice for warmer regions or early fall planting.

3. Champion
Fast-growing with big leaves. Known for heat tolerance and disease resistance. This variety is great if you want quicker harvests and bold, hearty greens. A good choice for warmer regions.

4. Morris Heading
Slightly looser head formation with thick, flavorful leaves. Excellent for cooking and freezing.

If you want the sweetest leaves, pick a variety known for cold performance and plan for a fall crop. If you’re unsure, Georgia Southern or Vates are safe, beginner-friendly options.
Collard Greens vs Kale (Quick Comparison)
Collard greens and kale are closely related, but they behave a little differently in the garden and kitchen.
Collards generally have larger, thicker leaves and handle cold weather slightly better, especially for long fall and winter harvests. Kale grows faster and offers more texture options, but collards tend to stay tender longer when cooked.
Both are easy to grow, nutritious, and productive, but collards are often the better choice if you want steady harvests in cold conditions, while kale offers more variety for salads and quick cooking.
Best Climate for Collard Greens
Collards thrive in cool to mild weather, but they can handle warmth better than many greens if you keep them watered.
Ideal Conditions
- Temperature range: 55-75°F (13-24°C)
- Cold tolerance: Can survive light frost
- They tolerate heat, but hot spells can make leaves tougher and increase pest pressure
- They shine in fall: Cooler nights improve texture and flavour
If your summers are very hot, collards often do best as a late-summer planting for fall and winter harvest.
When to Plant Collard Greens
You can plant collards in spring or late summer, depending on your local weather.
Spring planting
- Start seeds indoors 4-6 weeks before the last frost
- Direct sow outdoors 2-4 weeks before the last frost
Fall planting (often the best)
- Start seeds outdoors or indoors 8-12 weeks before the first expected frost
- Many gardeners aim for plants to be well-established before the real cold arrives
Collards can handle cold, but young seedlings grow faster when the soil is still warm.
How to Plant Collard Greens
You can grow collards from seed or transplants. Both work well.
Planting Collard Greens From Seeds
- Loosen the soil and mix in compost. Remove rocks and clumps
- Sow seeds ¼-½ inch (0.6-1.2 cm) deep
- Space seeds 18-24 inches apart in rows, or plant closer and thin later
- Keep soil evenly moist until germination (usually 5-10 days)
- Thin seedlings to proper spacing once they have a few true leaves
Starting Indoors (for transplants)
- Start seeds in trays 4-6 weeks before transplant time
- Provide strong light so seedlings don’t get leggy
- Transplant when seedlings have 3-4 true leaves
- Harden off for a few hours a day for 5-7 days before planting
- Make holes slightly larger than the root ball
- Place plants 18-24 inches apart
- Don’t bury the stem deeper than it was in the pot
- Water immediately after planting to help the roots settle
Spacing
Collards need room for airflow and big leaf growth:
- Baby leaf: 2-4 inches (5-10 cm) apart
- Plants: 18-24 inches (45-60 cm) apart
- Rows: 24-36 inches (60-90 cm) apart
If you’re growing “baby leaf” collards, you can plant closer and harvest young.
Soil Requirements for Collard Greens
Healthy soil is the foundation of good collard greens. These plants are heavy feeders, which means they prefer loose, well-drained soil that’s rich in organic matter to produce large, tender leaves. They stay in the ground longer and produce more biomass, so they need more nutrition over time.
Soil Requirements
- Soil type: Loamy, well-draining soil
- pH level: Slightly acidic to neutral (6.0-7.0)
- Organic matter: Compost or well-rotted manure is essential
Organic matter is especially important for collards because leaf size and tenderness depend heavily on nutrient availability. Poor soil leads to slow growth and tough leaves.
Before Planting
- Mix compost into the top 8-10 inches of soil
- If your soil is sandy, compost helps hold water
- If your soil is clay-heavy, compost improves drainage and root growth
Poor soil usually leads to slow growth and tougher leaves.
Container Requirements for Collard Greens
Collard greens grow surprisingly well in containers if given enough space.
- Minimum pot size: 12-14 inches deep and wide per plant
- Width: One plant per large pot (at least 12 inches wide)
- Container material: Plastic, fabric, or ceramic all work
- Drainage: Must have drainage holes
Use high-quality potting mix and add compost or slow-release organic fertilizer for best results.
Sunlight Requirements
Collard greens grow best in full sun, but they tolerate partial shade, especially in warmer climates. They can tolerate partial shade (especially in hot climates), which may actually help keep leaves more tender during summer.
They handle cold far better than heat. In hot weather, growth slows and leaves toughen; light afternoon shade can actually improve leaf quality.
- Ideal: 6-8 hours of full sun for fastest growth and thick leaves
- Minimum: 4-5 hours (growth may slow)
In cool weather, growth stays steady and flavor improves.
Watering Collard Greens
Collards want consistent moisture, not soaking wet, not bone-dry. Watering plays a big role in how tender your collard greens turn out. Inconsistent watering can lead to tough, bitter leaves.
Best Watering Habits
- Water deeply so roots grow down
- Avoid frequent shallow watering (it encourages weak root systems)
- Water at the soil level when possible to reduce leaf disease
- Increase watering during hot or dry weather
General watering rules:
- About 1-1.5 inches (2.5-4 cm) of water per week, including rainfall
Mulch Matters
Mulching around plants with straw or shredded leaves helps retain moisture and keeps roots cool. If the soil dries out too often, leaves become thick and chewy.
A 2-3 inch layer of mulch (straw, shredded leaves, or compost) helps:
- Keep moisture steady
- Reduce weeds
- Protect roots during cold snaps
Signs to Watch For
- Underwatering: Wilting, curling leaves, dry soil
- Overwatering: Yellow leaves, soggy soil, poor growth
If you want to maintain consistent soil moisture without daily hand watering, a solar drip irrigation system can make vegetable watering much more reliable, especially during hot or busy weeks.
Fertilising Collard Greens
Because collards produce lots of leafy growth, they appreciate nitrogen, especially after harvesting begins.
A Simple Feeding Plan
- At planting: Compost and a balanced vegetable fertiliser (optional)
- After 3-4 weeks: Side-dress with compost or a nitrogen-leaning feed
- After big harvests: A light feeding helps plants bounce back
Signs They Need Food
- Slow growth
- Pale green or yellowing older leaves
- Small, thin leaves instead of broad ones
Tip: Overfeeding late in the season can cause fast growth with poorer cold tolerance.
Cold Protection
Like many cool-season greens, collards benefit from light frost, which improves flavour and texture.
They can survive light frost and even temperatures down to the mid-20s°F once established.
Light Frost Benefits
- Reduces bitterness
- Sweetens leaves
- Improves texture
Ways to Extend the Season Even Further
- Mulch heavily around the base to protect roots
- Use frost cloth or row cover during hard freezes
- Grow them near a fence or wall that blocks wind
- In containers, move pots to a sheltered spot during extreme cold
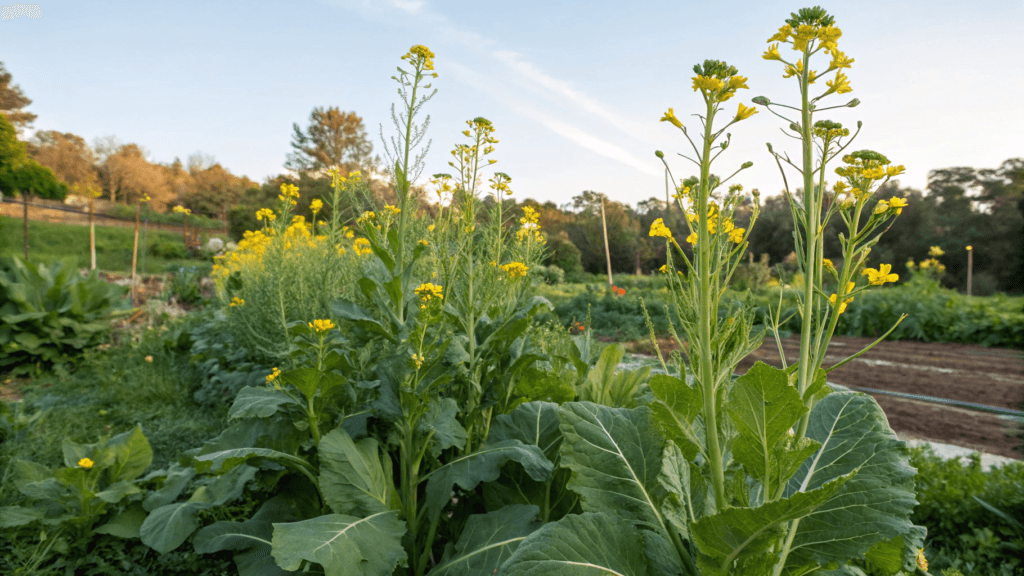
How to Prevent Collard Greens From Bolting
Bolting is when the plant switches from leaf production to flower production. Once it bolts, leaf quality drops fast.
Heat Stress Causes
- Thick leaves
- Strong flavor
- Slower growth
Common Bolting Triggers
- Sudden heat
- Drought stress
- Big temperature swings
- Plants staying too long in warm conditions
How to Prevent Bolting
- Plant early enough to mature before extreme heat (fall crops bolt less)
- Keep soil evenly moist
- Mulch to stabilise soil temperature
- In hot climates, provide light afternoon shade
- Harvest regularly, older plants can decide to “finish” if neglected
Also, don’t wait too long to harvest. Younger leaves are always more tender and mild. If a plant starts bolting, you can still harvest usable leaves for a short time, but it’s often best to replace it.
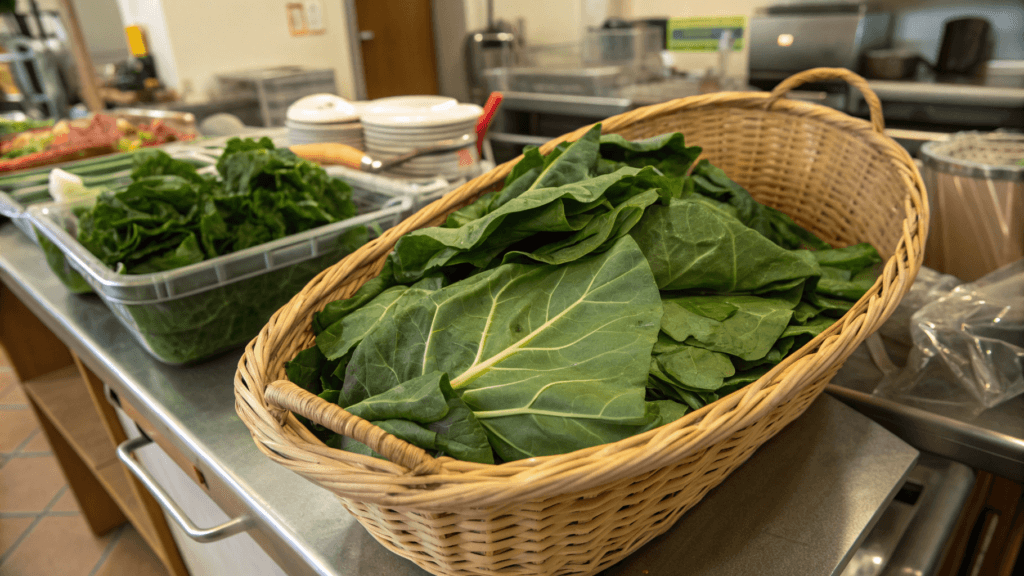
How to Store Fresh Collard Greens
Fresh collards store surprisingly well if you handle them right.
Short-term (fridge)
- Don’t wash until you’re ready to use them (extra moisture speeds decay)
- Wrap leaves loosely in a paper towel
- Place in a breathable bag or container in the crisper drawer
They often keep 5-7 days, sometimes longer if very fresh.
Long-term (freezing)
- Wash and chop
- Blanch for 2-3 minutes
- Cool in ice water, drain well, and pack into freezer bags
Frozen collards are great for soups, stews, and braises and can keep quality for up to 10-12 months.
Common Collard Greens Problems
Collards are tough, but pests love brassicas. The good news: most issues are manageable with early action.
Common Pests
- Cabbage worms/loopers: Holes in leaves, green caterpillars
- Fix: Hand-pick or use floating row covers.
- Aphids: Clusters on new growth, sticky residue
- Fix: Rinse off with water or use insecticidal soap.
- Flea beetles: Tiny holes, “shotgun” damage on seedlings
- Fix: Mulch and row covers work well.
- Slugs: Irregular holes, slime trails
- Fix: Mulch management, traps, and hand removal at night.
Common Diseases
- Downy mildew/leaf spot: Discolouration and spotting
- Fix: Avoid overhead watering and improve spacing and airflow.
- Clubroot (soil disease): Stunted plants, swollen roots
- Fix: Rotate crops and maintain proper soil pH, and avoid infected soil.
Rotate your brassicas (collards, kale, cabbage, broccoli) so they don’t grow in the same spot year after year.
Best Companion Plants for Collard Greens
Good companion planting can help with pests, pollinators, and space use.
Good Companions
- Onions, garlic, chives: May help confuse pests with scent
- Herbs like dill, cilantro, and thyme can attract beneficial insects
- Marigolds and nasturtiums: Helpful “trap” or distraction plants in some gardens
- Beans/peas (legumes): Can improve soil nitrogen (especially in rotation plans)
- Celery: Often pairs well in mixed beds
Plants to Avoid
- Other brassicas right next to collards can increase pest pressure (not “bad,” but watch closely)
- If you’ve had clubroot or recurring brassica problems, avoid grouping brassicas too tightly
Harvesting Collard Greens
Collard greens are ready to harvest when leaves are large, dark green, and firm, usually 60-85 days after planting.
When to Harvest
- Baby leaves: Often ready in 30-40 days, or leaves are 10-12 inches long
- Full-size leaves: Usually 60-85 days depending on variety and weather
How to Harvest for Continuous Growth
- Pick outer leaves first, leaving the centre “growing point” untouched
- Harvest in the morning for the crispest leaves
- Don’t strip the plant bare; leave at least 5–7 healthy leaves to keep it growing strong
- Don’t take more than one-third of the plant in a single harvest
The plant continues to produce fresh leaves for weeks or months, allowing one plant to yield multiple harvests.
Young vs Mature Leaves
Collards keep producing for months. With regular harvesting, a single plant can sustain you throughout the entire season.
- Young leaves: Tender, mild, great for salads or quick cooking
- Mature leaves: Heartier, perfect for braising and slow cooking
How Long Do Collard Greens Take to Grow?
Collards are not instant greens, but they’re steady and dependable.
- Germination: about 5-10 days (faster in warm soil)
- Baby leaf harvest: 30-40 days
- Full-size leaves: 60-85 days
Growth slows in extreme heat or cold, but plants often bounce back once conditions improve.
Conclusion
Collard greens are one of the most cold-tolerant and reliable leafy vegetables you can grow. They don’t demand perfect conditions, they forgive beginner mistakes, and they keep producing long after other greens give up.
If you’re new to gardening, collards are a confidence builder. Plant them once, care for them simply, and enjoy steady harvests through fall and winter. For best results, grow collard greens alongside other cool-season leafy vegetables and let your garden work with the seasons, not against them.
Once you grow collards successfully, you’ll understand why so many gardeners consider them a must-have crop year after year.
After a season or two, most gardeners find collards earn a permanent spot in their fall garden.

Leave a Reply